This page was originally created as a diary of the build of the garage from the planning
to completion so the wording is often in the present and future tenses. I stopped updating
the page when the compressor and lift were installed and turned my time and attention to
actually using the garage. Also, at the time we did the build the whole idea of Pop's
Garage as a teaching facility was nonexistent.
We bought our house in March 2008, and part of the reason we found it so attractive was
that, with an acre of land, we had enough room to build a shop for restoring and modifying
older cars. Or so we thought.
Enter Boulder County...
Our first plan was to build an accessory shop to the north and west of the house, leaving
the existing small garage east of the house as orginally built and use it to get our daily
drivers in out of the weather. The proposed shop would be too big said the county. It would
be seen from the road said the county (everything on the property can be seen from the road).
We think the small amount of fill you'd have to bring in would be excessive said the county.
So we began looking for a Plan B.
What we found was that the county had recently enacted a number of new regulations to limit
the size of homes in the county and, even though a shop or garage wasn't space that could be
"resided" in, it was still considered "residential" space for calculating the home's size.
We started examining our options and narrowed them down to the only one the county indicated
might work; make the existing garage bigger.
A simple plan fraught with peril. Even though we were using parts of the existing building
this couldn't be classified as an addition. No. It was demolition and new construction. And, by
the way, the county's new BuildSmart Program says no more demolition, only deconstruction with
as much recycling as possible (something we actually didn't mind). But BuildSmart also says
that since we wanted to add heat, it had to meet ridiculous HERS numbers from the RESNET model
of "energy efficiency". This knee jerk plan showed that the county was more interested in appearing
to be green than in actually encouraging property owners to make their houses and accessory
structures more efficient. At the time this is written, the county is compiling input received at
a series of public meeting on the program that brought in hundreds of worried property owners,
contractors, installers, and others who voiced their anger, frustration and contempt at the
current poorly thought out, draconian, and onerous regulations regarding energy usage. Only time
will tell if the issues and suggestions raised at these meetings will have any impact on making
this a program that truly does what it purports to.
Enough background. The new garage is 30 feet wide and 43 feet long on a 1290 square foot
concrete slab. The walls are 10 feet high and the peak of the gambrel roof is 23 feet 6 inches
above the slab. To make this as useful as possible we're putting in a 200 amp electrical service
with both 110 and 220 volts outlets. With the tools my dad left and those I've acquired over
the last 40 years along with new purchases like a MIG welder, a plasma cutter, and maybe a TIG
welder, I plan to have a ball getting back to something I haven't done in nearly thirty years.
Garage Photos
I'll post photos here as we progress from original garage to new "barn". All of the work was done
by a contractor that we can't recommend highly enough,
Chris Marino, who also did all the remodel
work on the house after we bought it. If you give Chris a call, tell him you heard about him here. Click
on the small images to see them at a larger size in a new window. If you don't see any new pictures,
it's either because I've been lazy or you need to click your browser's refresh button.
It was suggested that I put up a floorplan drawing of what the garage will look like when done so here's
a very simplified version. There will be a room in the southwest corner with an overhead door big enough
to put a car in and close off from the rest of the garage. This will be handy for any number of things such
as rebuilding an engine while sanding or welding in the larger space to keep the build clean. There will
a two post lift in the southeast part of the garage just because they're not that expensive any more and
at this point in my life, I deserve it ;^). A large air compressor will be located along the south wall
and plumbed to various parts of the garage so there will be air available everywhere. The car outline in
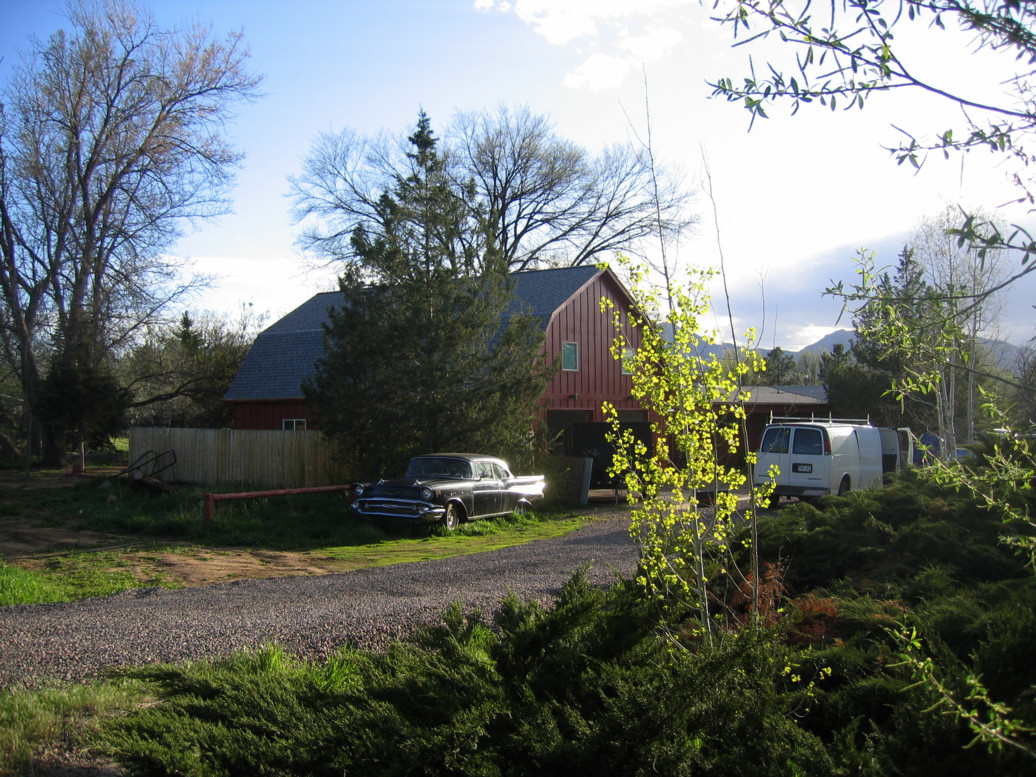
the drawing is that of a 1937 Chevrolet Sedan which, not coincidentally, will be my first project. The
photo on the right shows the car sitting next to the 2000 Firebird that was originally scheduled to
give up it's drive train for the rebuild. Current candidate is 2005 GTO which can be seen under wraps
in some of the photos that show the east side of the garage.


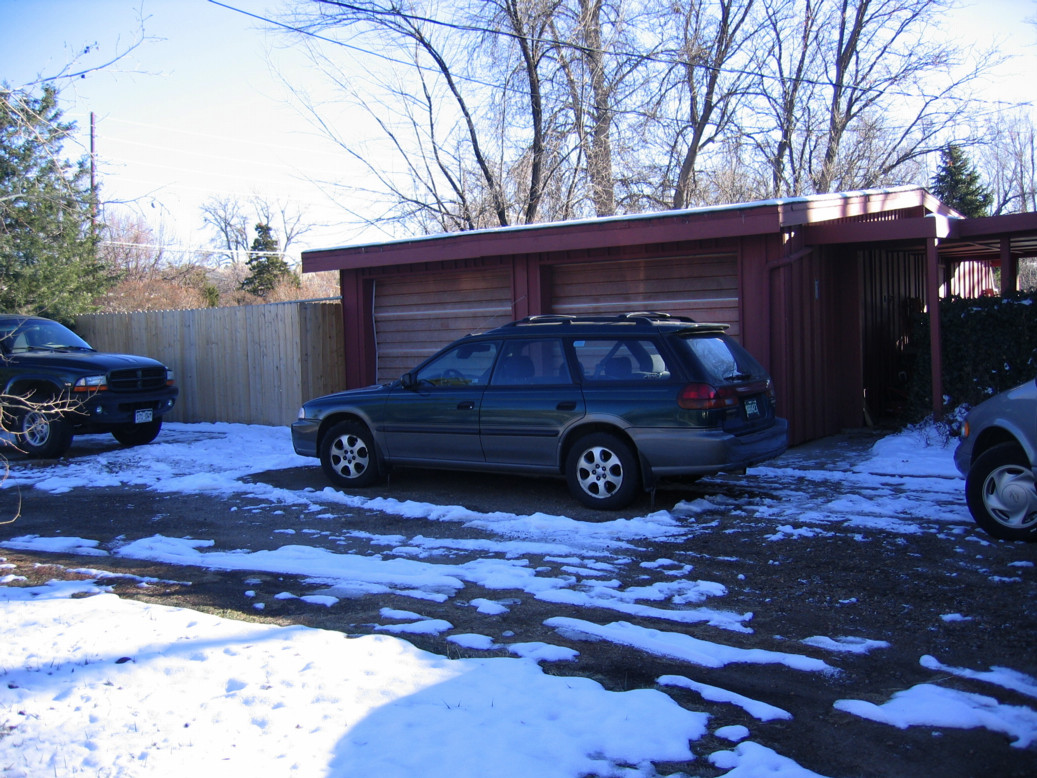
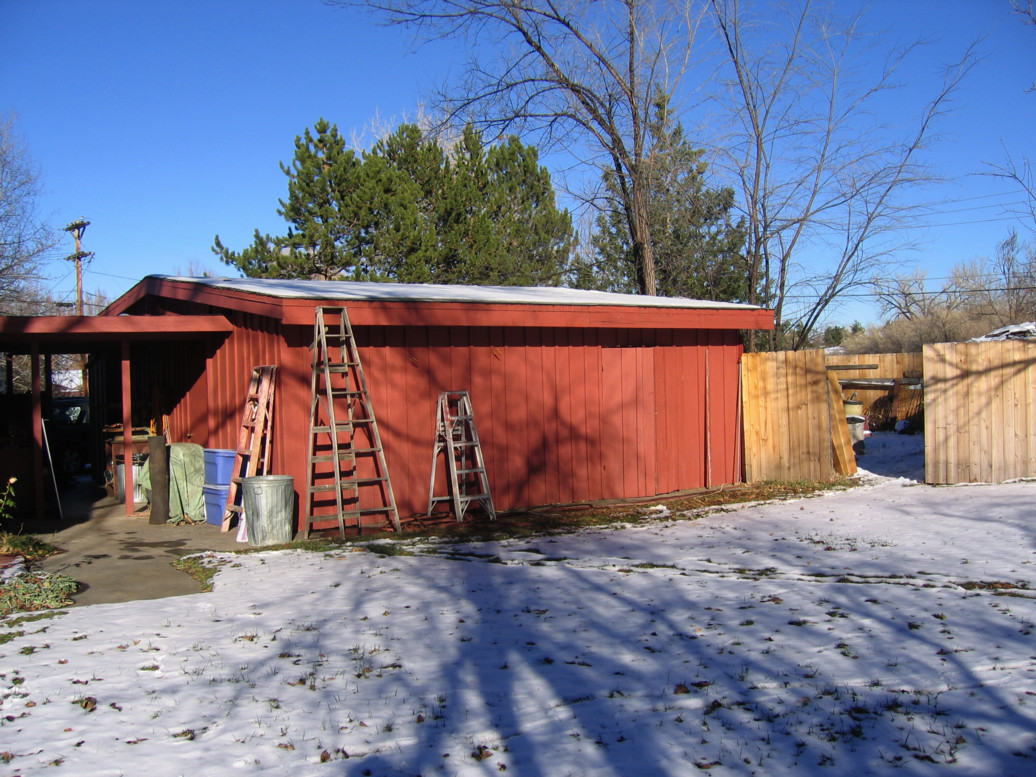
24 November 2007
Here's how the front and back of the garage looked when we first became interested in the house. The
garage doors you see here were only precariously nailed into the openings and they were not capable of
being opened. The garage was being used as a massive pantry and cold storage. You can also see the
covered breezeway that connects the house and garage - a feature we're keeping.


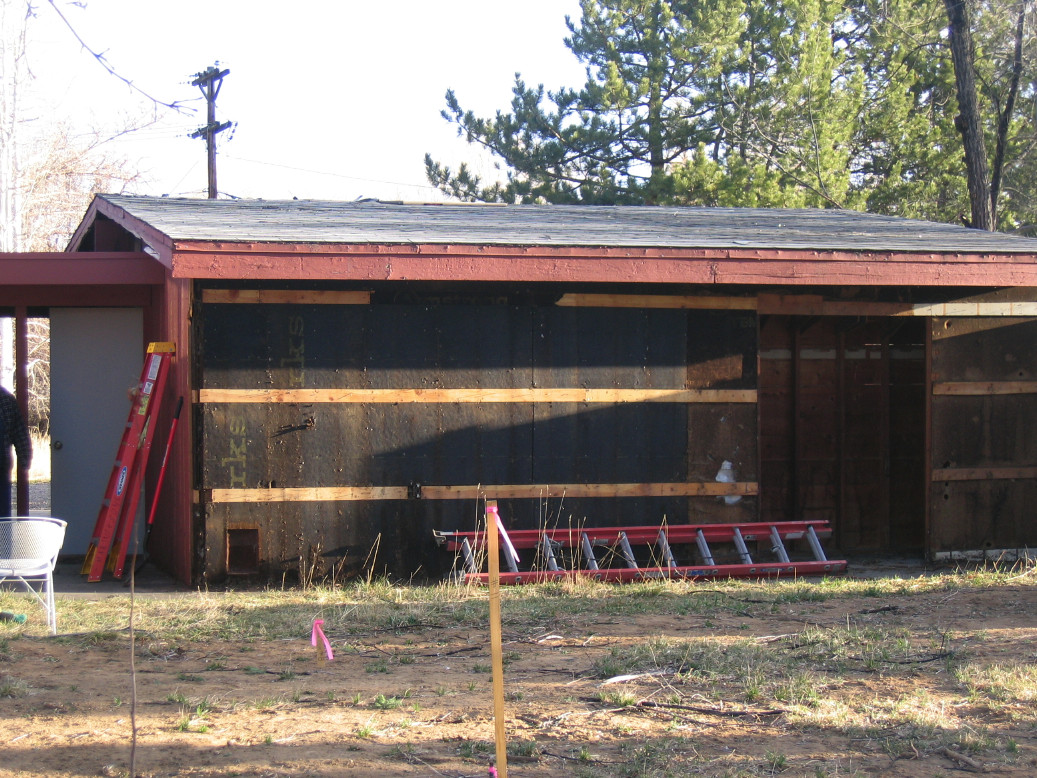
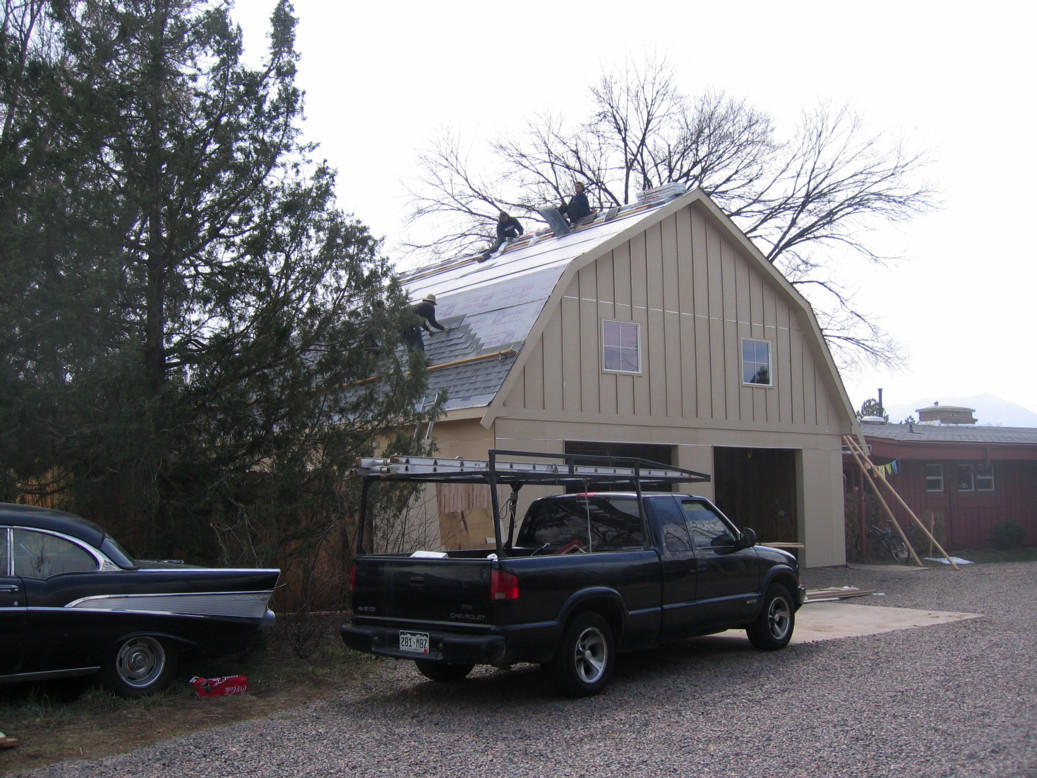
3 March 2009
Tuesday morning and the siding is coming off. Because of the way this was originally constructed nearly 50
years ago (and I'm sure not to code even then), less than half the materials were recyclable. A thick coating
of tar under 7 layers of tar paper topped by 2 layers of shingles kept the rain out but made removing the roof
a massive task. These are nearly the same two views as above.


5 March 2009
Thursday morning and the roof is off. Notice the chunk of roof with the multiple layers of tarpaper on top of
the half inch plywood. This was why the roof couldn't be recycled. By afternoon, the roof is gone as are half
the walls.


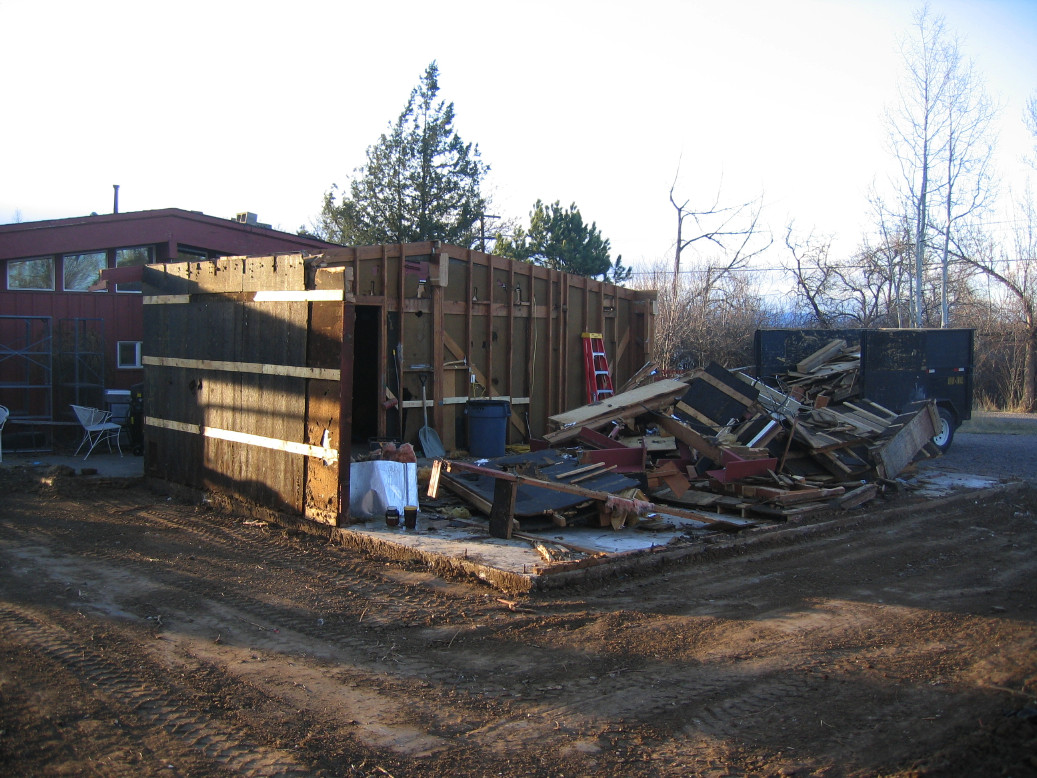
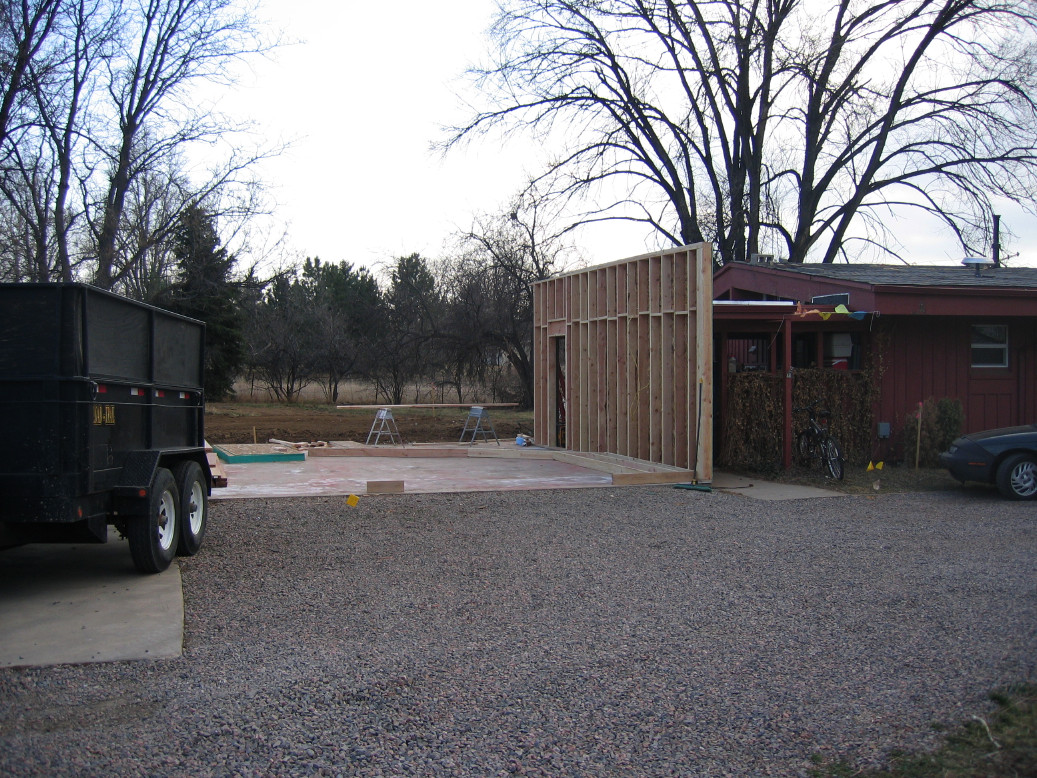
9 March 2009
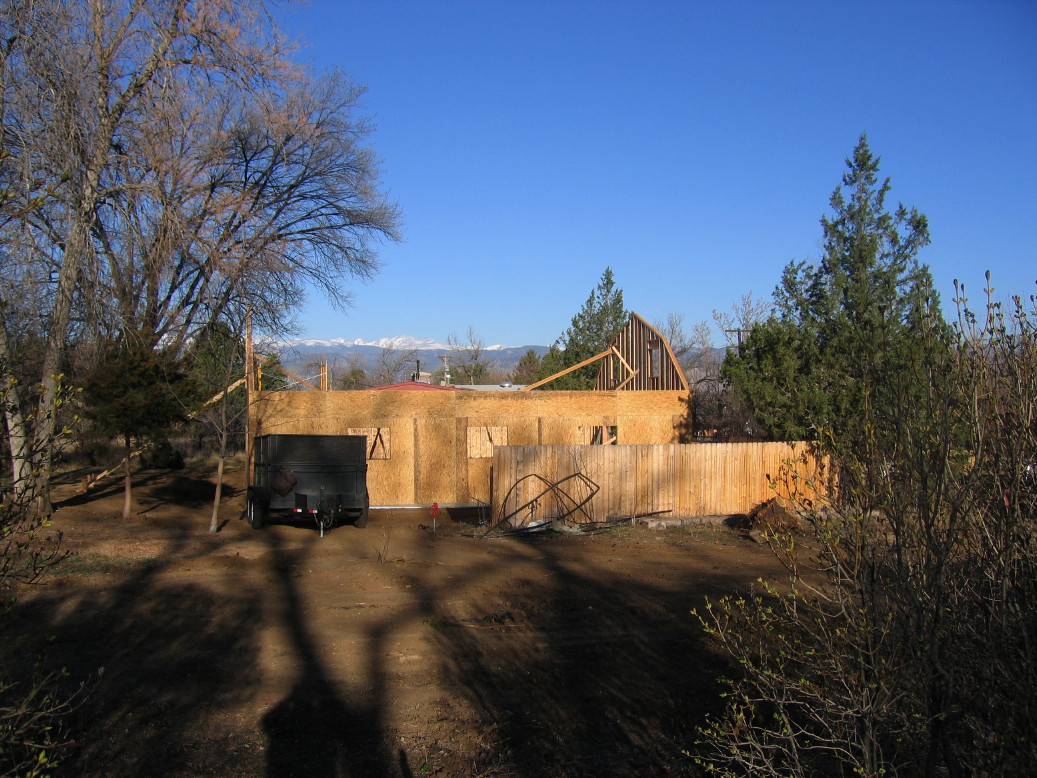
Early morning and the old garage is gone. Later that day we have the beginning of the new garage as the west
wall starts to go up. Right now the limiting factor is the size of the existing concrete slab which, at 638 square
feet, is less than half the size the garage will be. Notice the beginning of the west half of the north wall lying
on the slab. The north side of the garage is where the overhead doors will be.


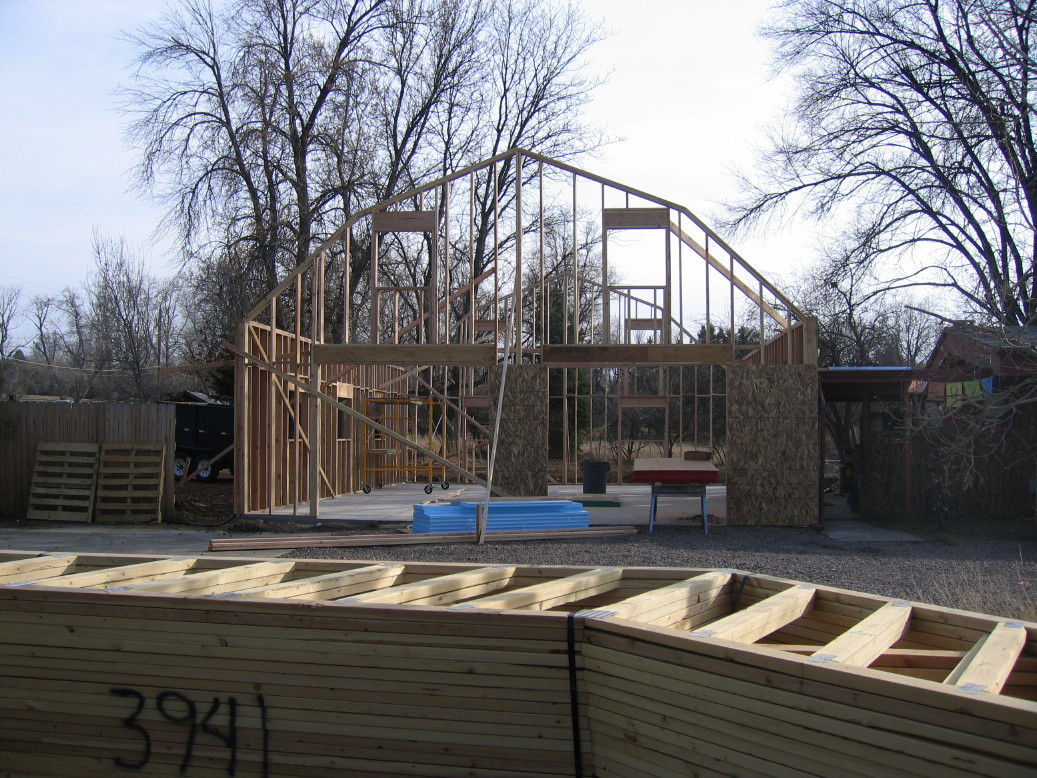
10 March 2009
The west half of the north wall is up. While the roofline appears evident here, this is really only the line
of the bottom chord of the roof trusses. The actual peak will be about 4 feet higher than this. There will be
plenty of interior height for doing all the kinds of things that need to be done when working on cars. Also
evident here is the earthwork that's been done in preparation for setting forms and pouring concrete that will
happen in just a few days.

12 March 2009
The forms are up, the rebar and mesh are in place, and everything is ready for concrete tomorrow morning. This
gives an idea of how much extra floor space the new garage will have when done.


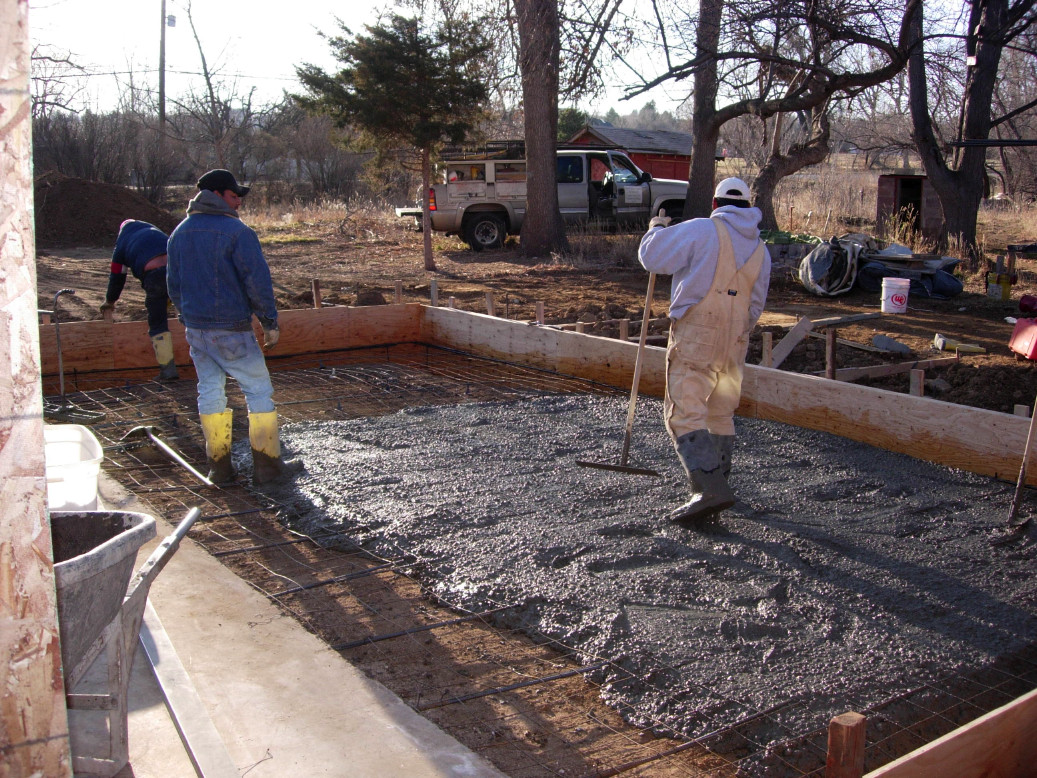
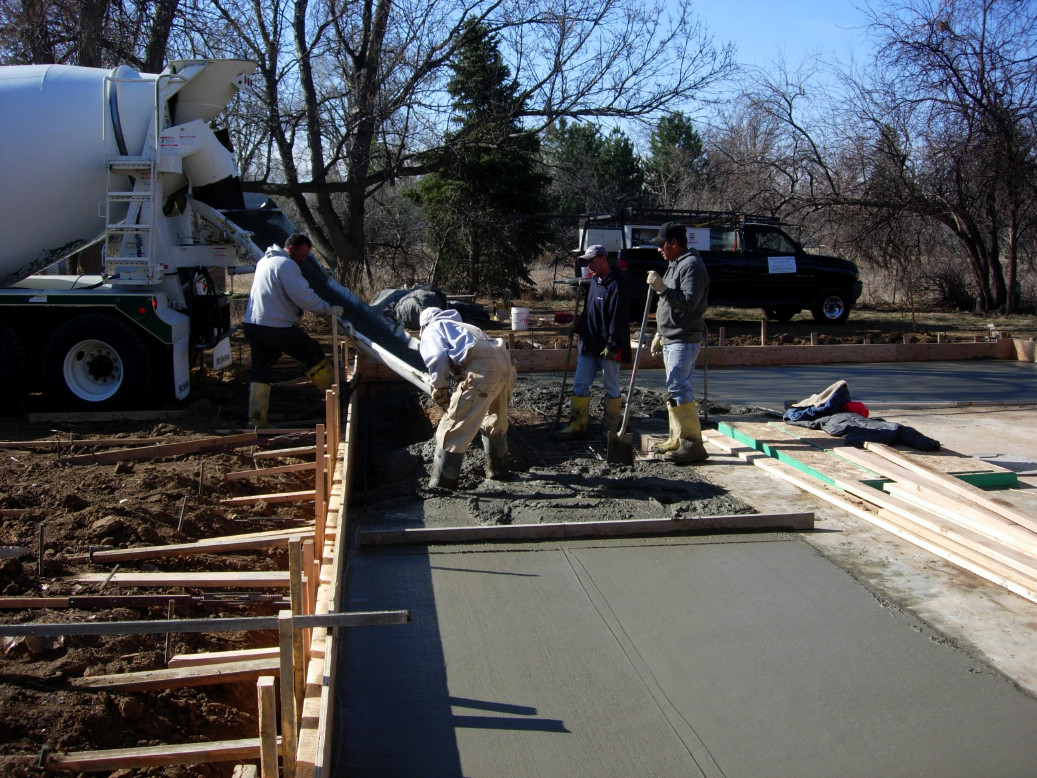
13 March 2009
As the first photo shows, one truckload of concrete (9 cubic yards) doesn't go very far. To pour both the slab
and the integral footers took 30 cubic yards and half a day of labor.


14 March 2009
Two weeks of work. The old garage is a memory and walls for the new garage are staged on the old slab, waiting
for the green concrete to cure for a couple of days and the insulating blankets to come off.

16 March 2009
East and west walls are up now that the blankets are off the slab. The east side of the north wall is up too, but
the gable window hasn't yet been framed.


17 March 2009
The trusses are here and will get set next week. The north wall is framed now and the east side of the south
wall is framed and up.


18 March 2009
The south wall is done and the slab and foundation have been backfilled.

19 March 2009
The walls are getting sheathed to give them stability in preparation for setting the trusses. The 10 foot height
of the walls is obvious in places where 8 foot sheets of osb have not been topped off. It's also obvious as the
overhead doors in the north wall are also 8 feet high. For reference, the windows in the walls are 3 feet high
and 4 feet long.


20 March 2009
The end of week 3. Sheating continues, but the plan for setting trusses next Monday could be upset if the snow
that's predicted shows up. Rescheduling could be a problem since the crane that's needed for this part of the
project may be tough to get back soon. We'll keep our fingers crossed that it's dry and calm on Monday.


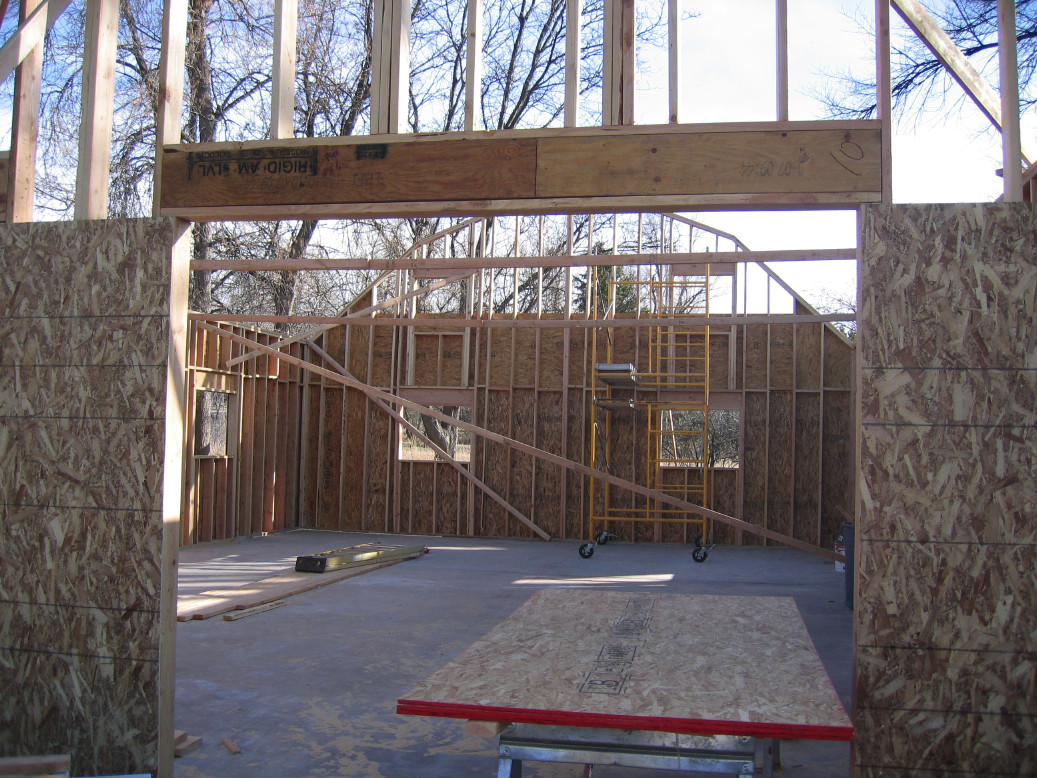
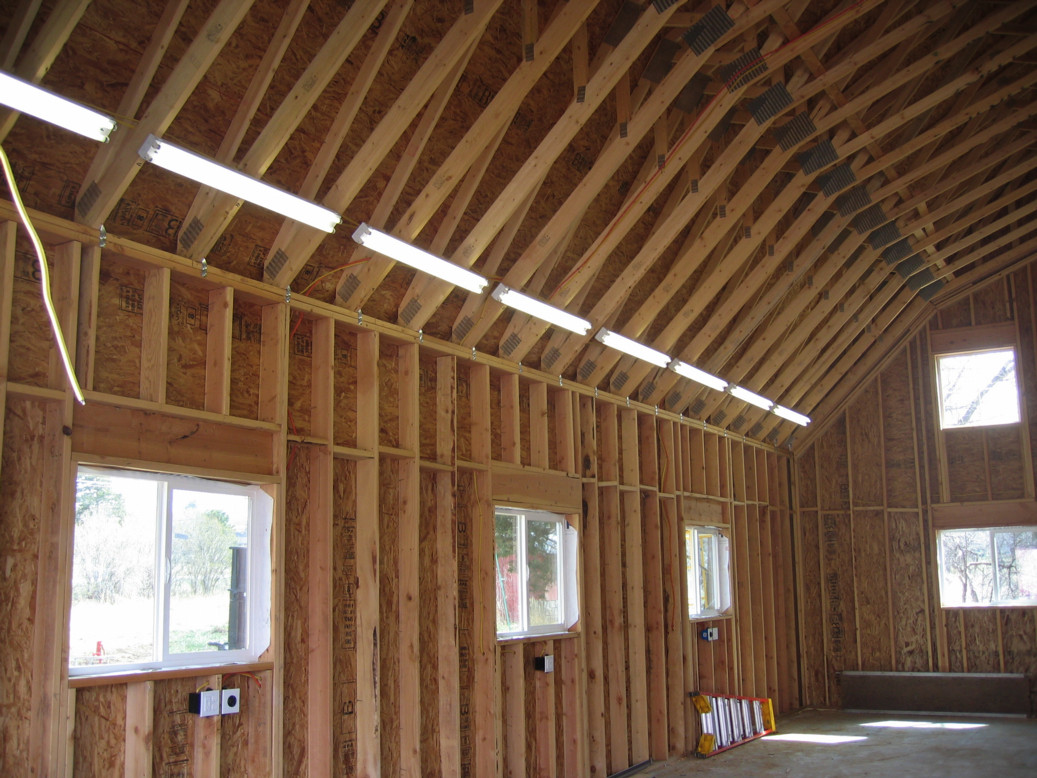
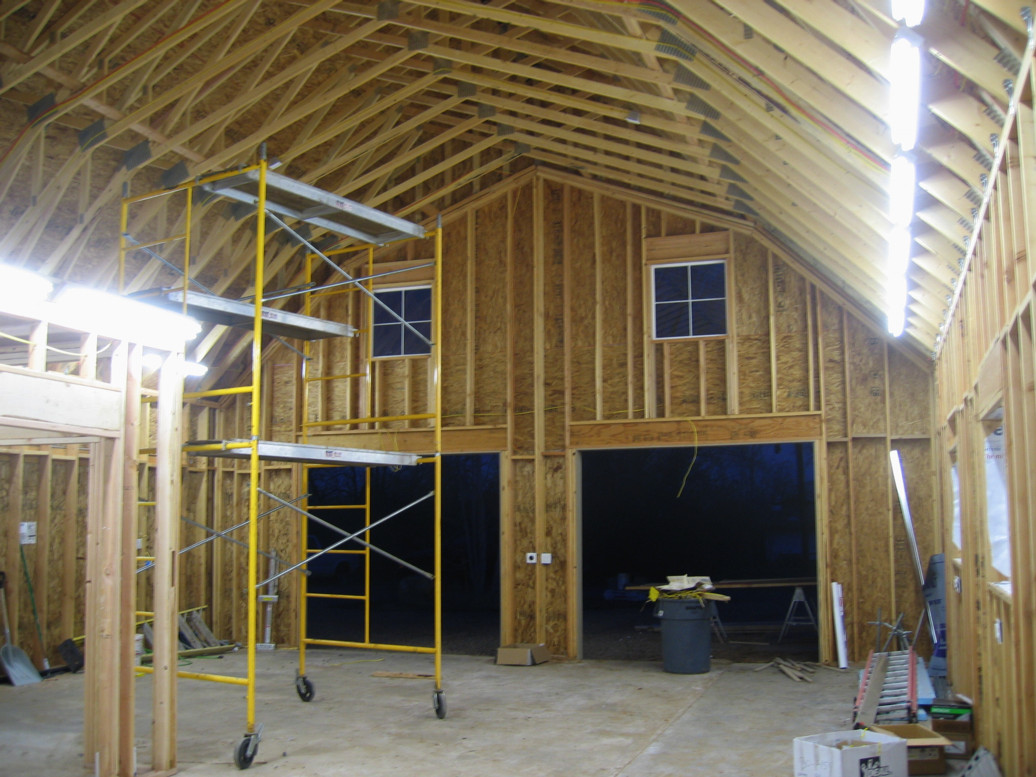
21 March 2009
Even though I'd walked the garage with our contractor yesterday to determine where the electrical outlets will
be (and there will be enough that long extension cords won't be needed), I spent some time this morning just
standing in the space, looking around, and trying to visualize where things like shelves will be. That process
showed me some places where I think outlets were not placed correctly yesterday, but since the power hasn't
been run yet, the changes shouldn't present any problems. Here are shots of the north ends of both the west (left)
and east (right) walls from the inside.


Here are two photos taken from the road showing the house and the snow still on the front range.


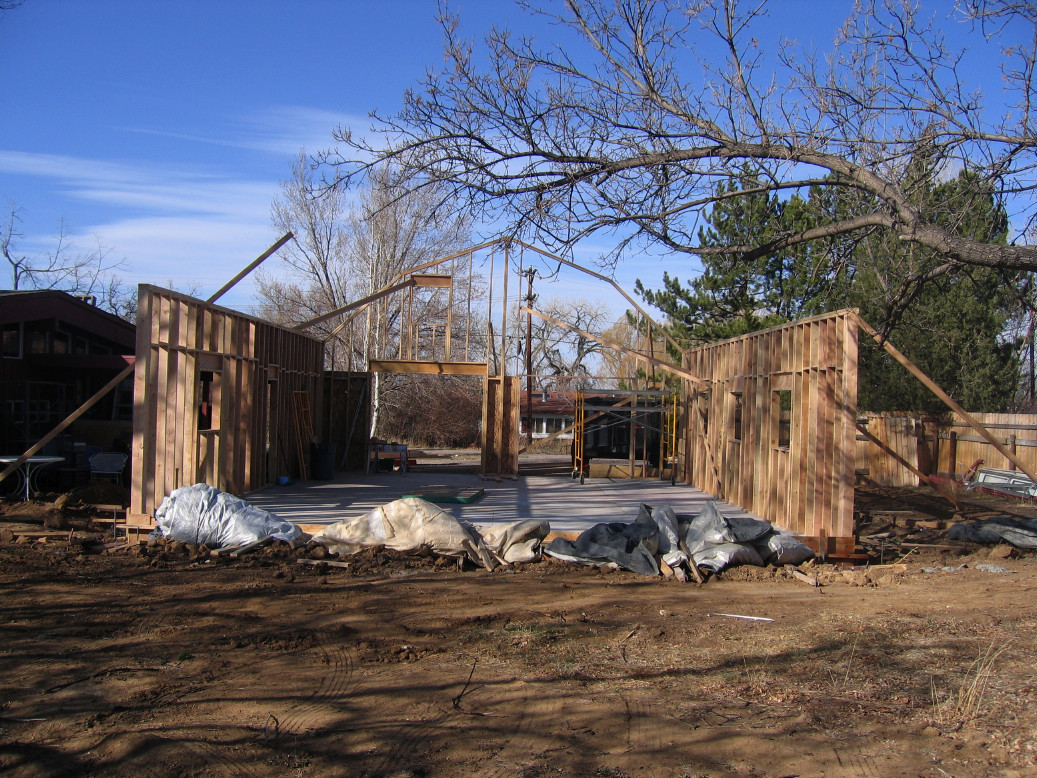
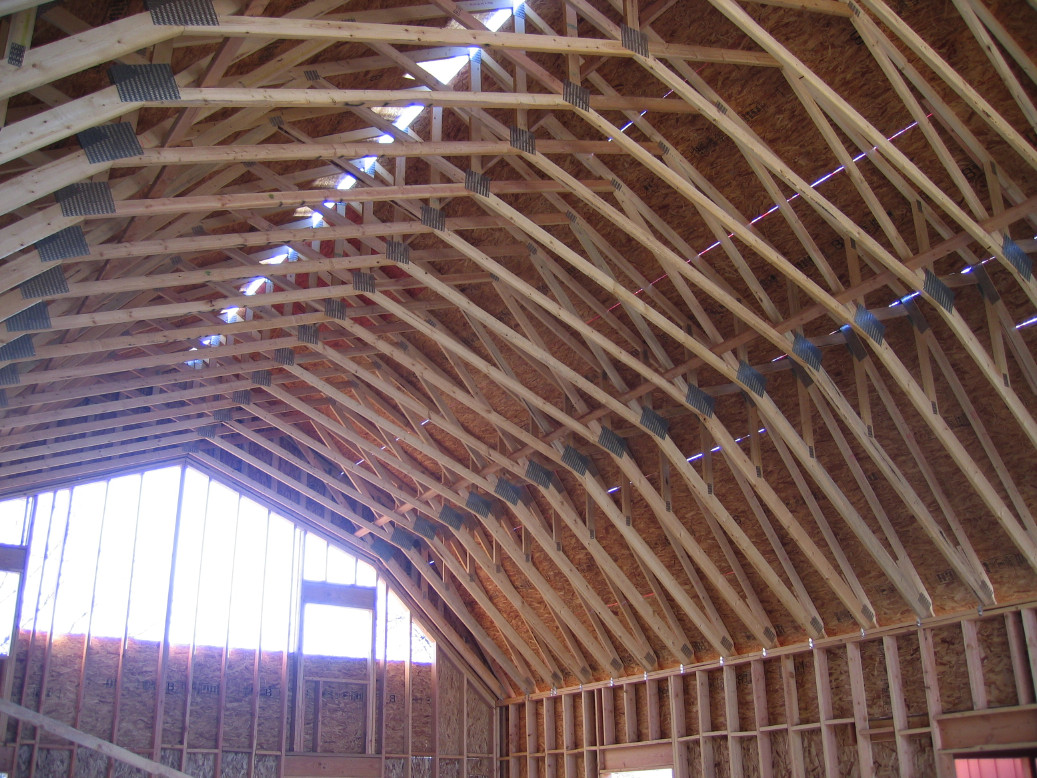
23 March 2009
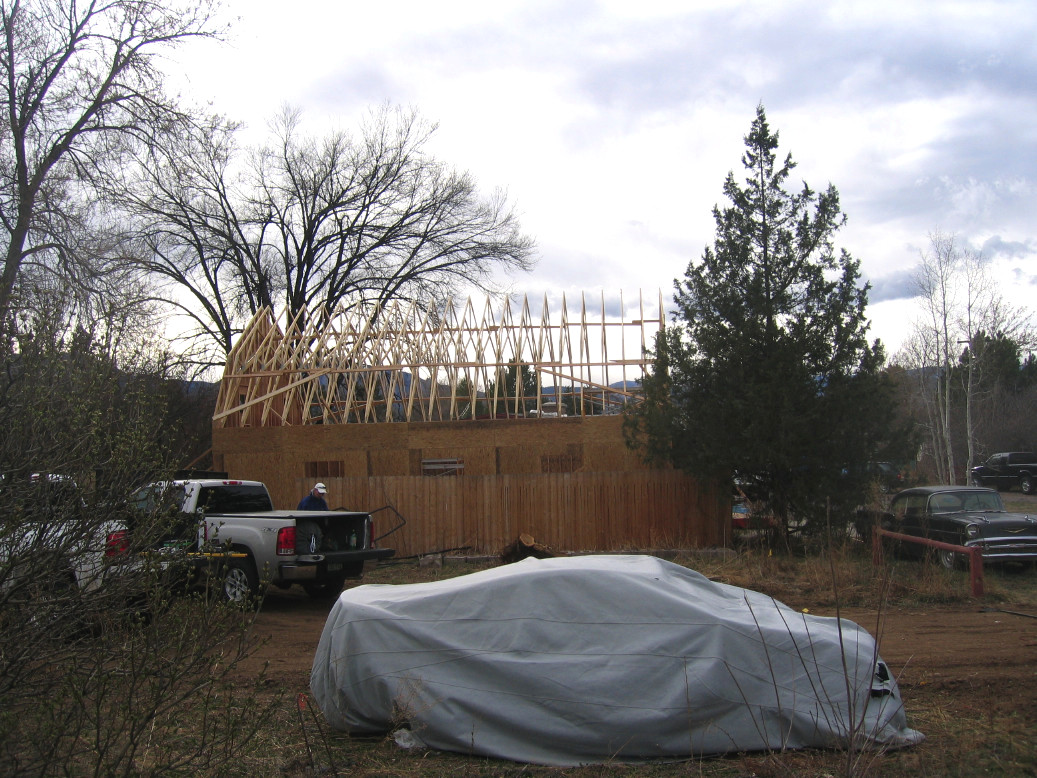
The garage gods were smiling on us. After some horizontal rain and sleet about 3:00 this morning the day dawned
cool, cloudy, dry, and with only minimal wind. The crane showed up about 1:30 and in 3 hours we had all 23
trusses set and braced. While I had built houses as a teenager, doing this kind of work is not something I'm
used to any more and I'm stiff and sore. But I've also got a grin on my face that it will take a long while to wipe
off. The weather's supposed to be variably cruddy all week so work may slow a little, but our contractor wants
to have the roof sheathed with plywood by the end of the week. That's the GTO under the car cover in the middle
right-hand photo.


25 March 2009
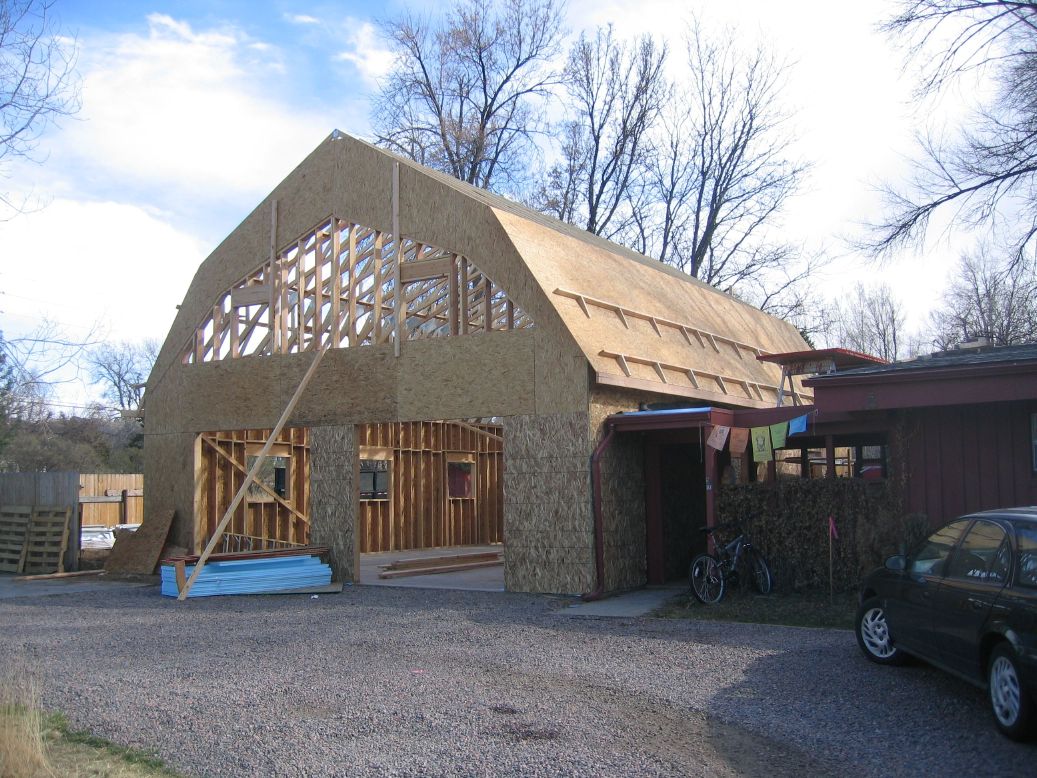
Metal hangers are installed on all of the trusses and the first slope on the west side of the roof is sheathed
with osb. Looks like the storm will hit tonight or tomorrow morning...


28 March 2009
Storm it did. We got a typical spring upslope storm on Thursday the 26th which left us with 15 inches of snow
in just about the same number of hours. Friday was cold and blustery in the morning but the sun came out in the
afternoon. Today it looks like I need to get the inside of the garage shoveled out and clear off stacks of building
materials.

31 March 2009
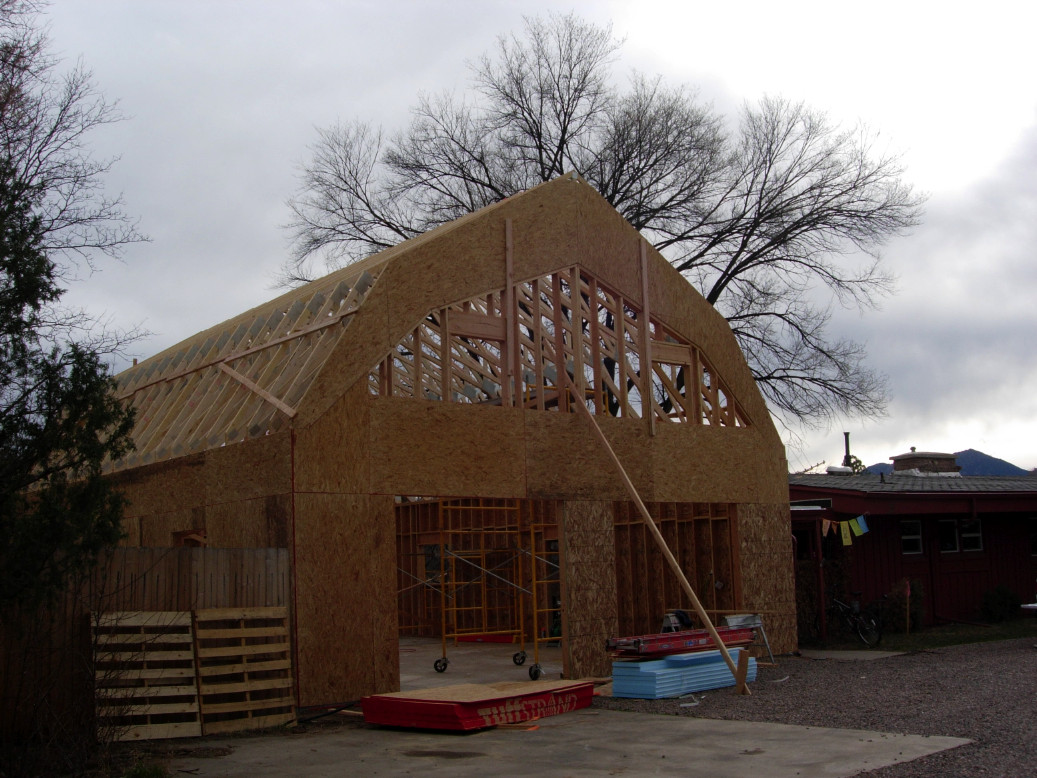
Yesterday spit snow and was sufficiently windy to keep them from sheathing the rest of the roof. But today was
just breezy and sunny although still only in the low 40s. The roof is almost completely sheathed with about an
8 inch gap at the very peak. Walking inside, it really feels like a building now. The windows showed up today so
we're one step closer to having it weather tight.


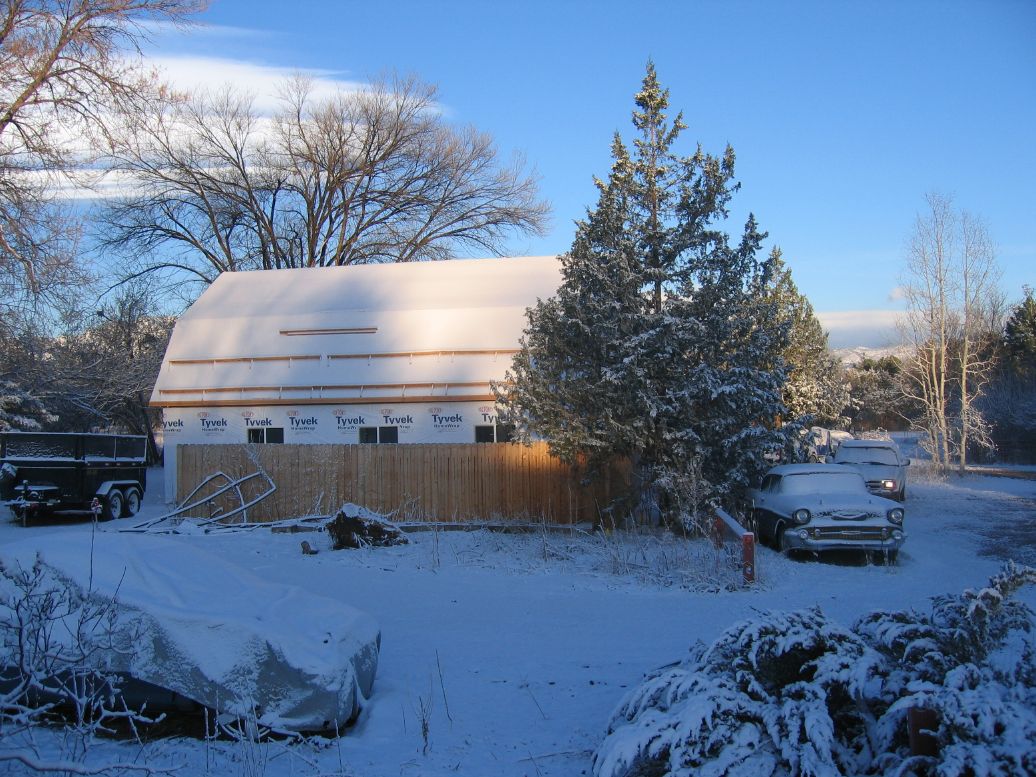
01 April 2009
Snow again this afternoon but the last of the osb is up on the gables, the Tyvek wrap is started and the windows
are in! I won't have a lot of snow clearing to do this time around.

02 April 2009
Nice and sunny this morning so work can continue. The contractor said they'd be ready for garage doors next
Wednesday so I need to get that process going. Cool lenticular clouds too.


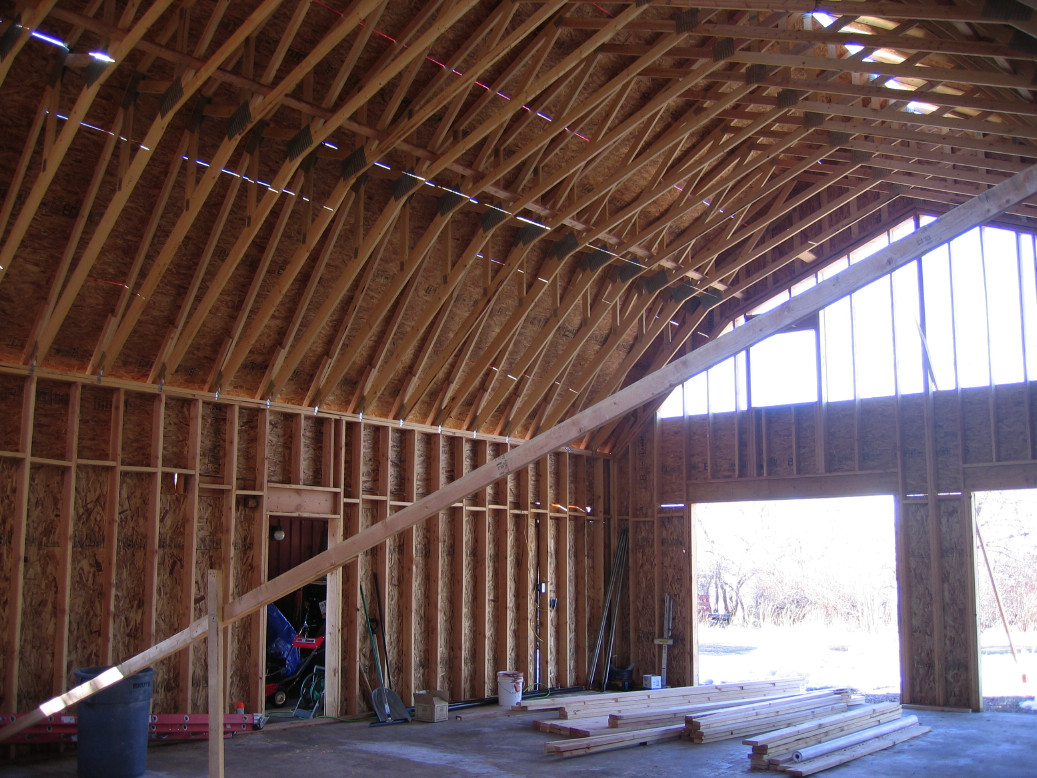
The interior room is framed. It was pointed out to me that what this amounts to is a one car garage inside
the larger garage. One of the older garage doors will be used to provide access and seal this room off for
tasks that require sequestering the space.


04 April 2009
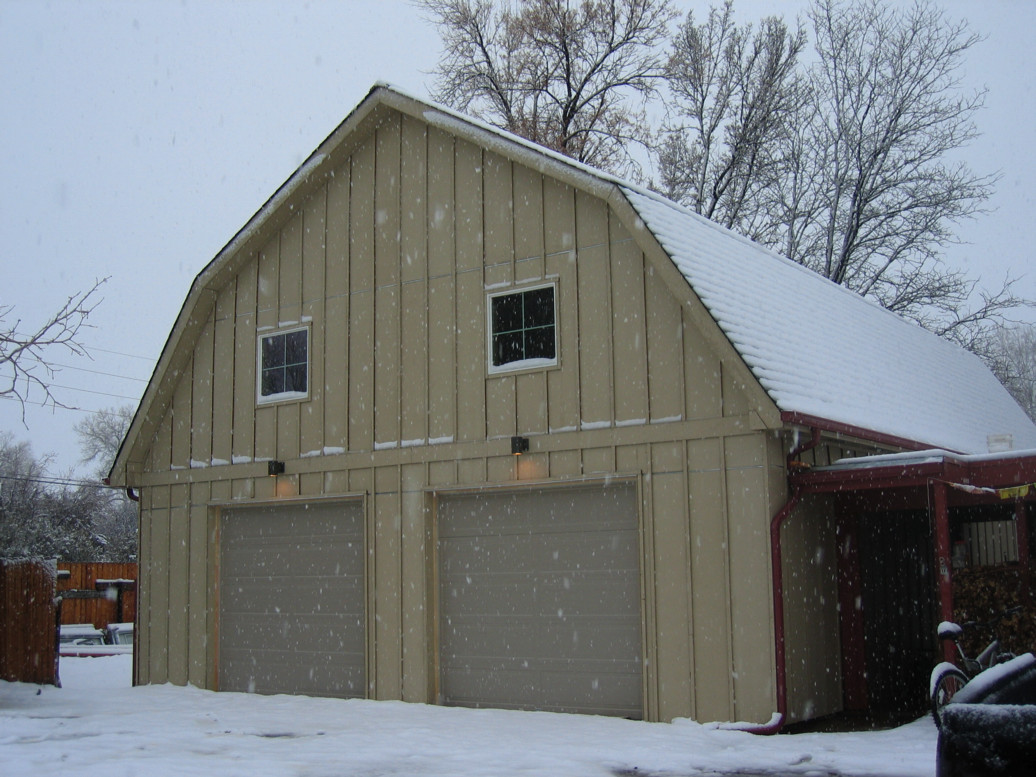
Seems that if you ever want to put an end to a winter drought in Colorado, all you have to do is start
building a garage. We've gotten about 20" of snow in the last 10 days, but we're in desparate need of the
moisture. The roofers put down the felt yesterday so that the only snow that gets inside the garage this
time will have to come in through the door openings and with the wind today that could just happen. They'd
wanted to start putting shingles up on Friday, but the county requires shingles rated for 130 mph winds so
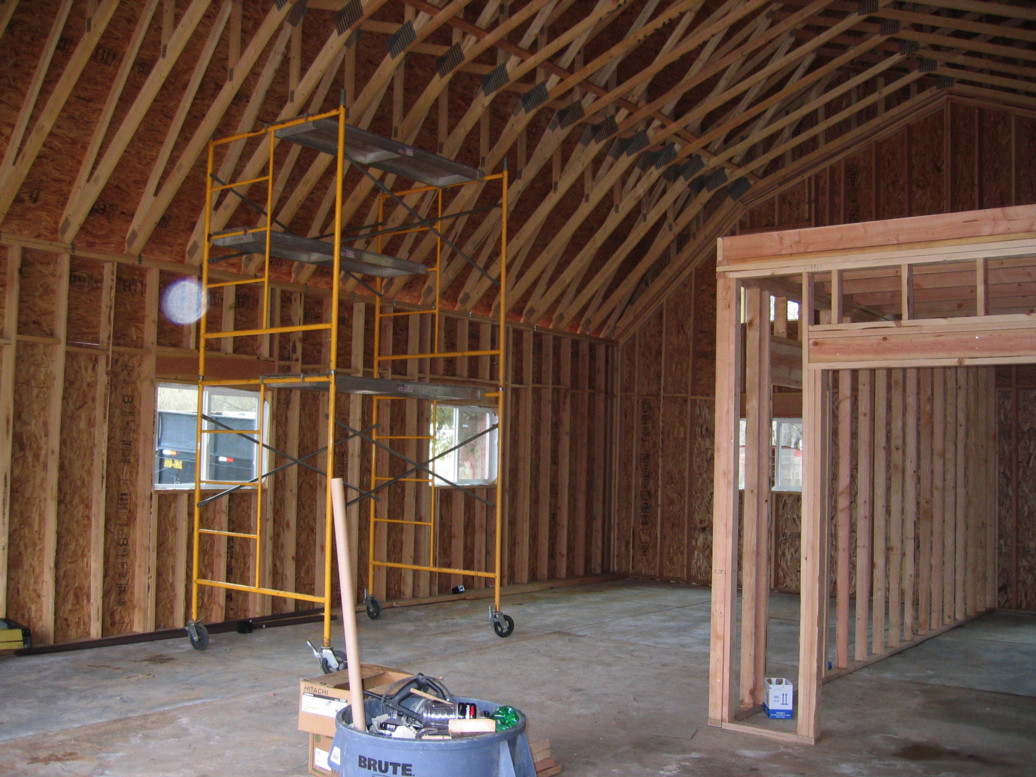
it will be next week before we can get those. The siding is started around the garage doors and some of the
scaffolding that was outside is now set up inside so the electrician can start wiring next week.


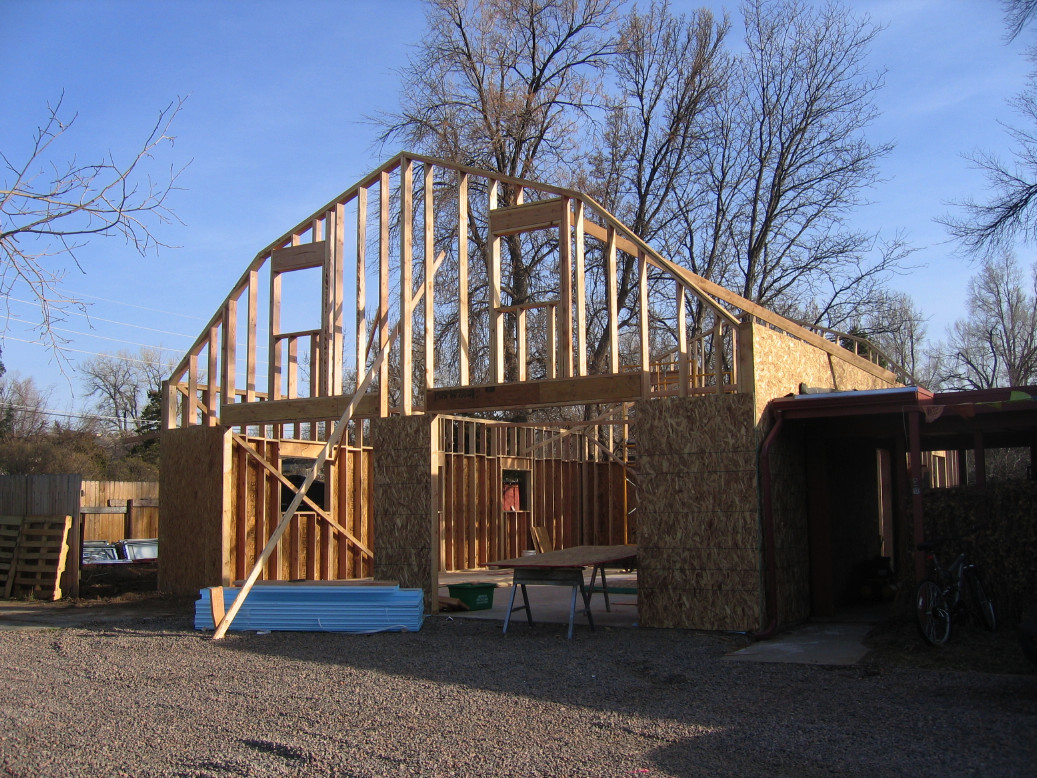
06 April 2009
The siding is up on the north, west, and south walls. The man lift arrived today so that Chris can get
siding and trim up on the gables.


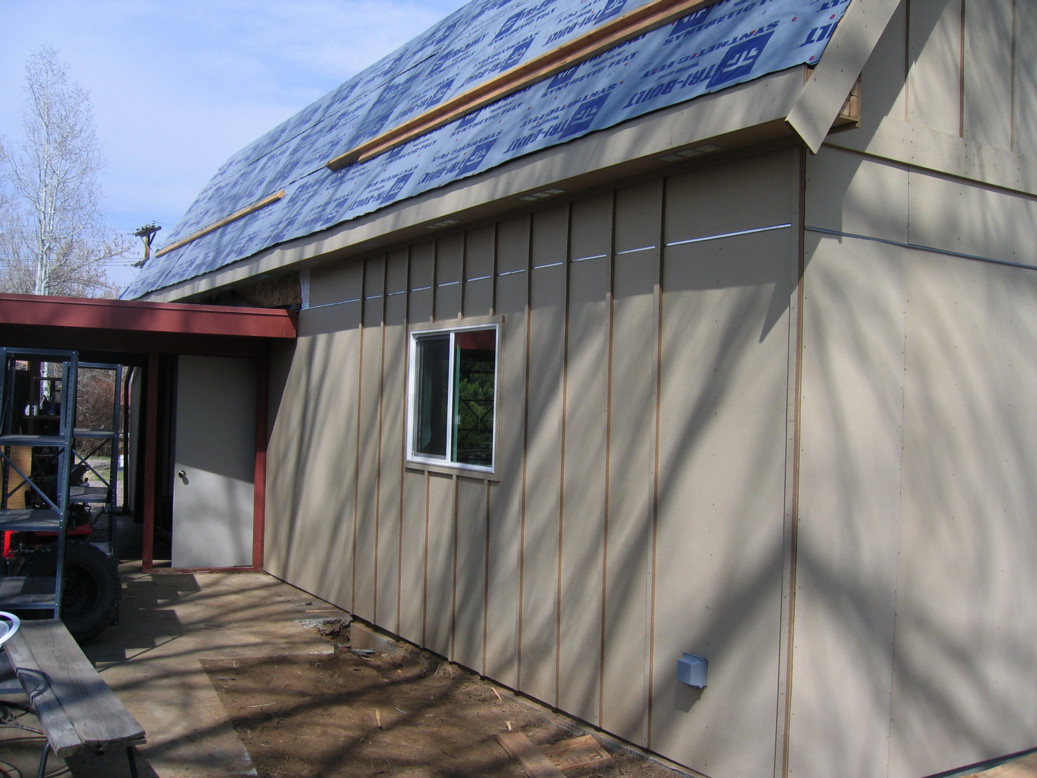
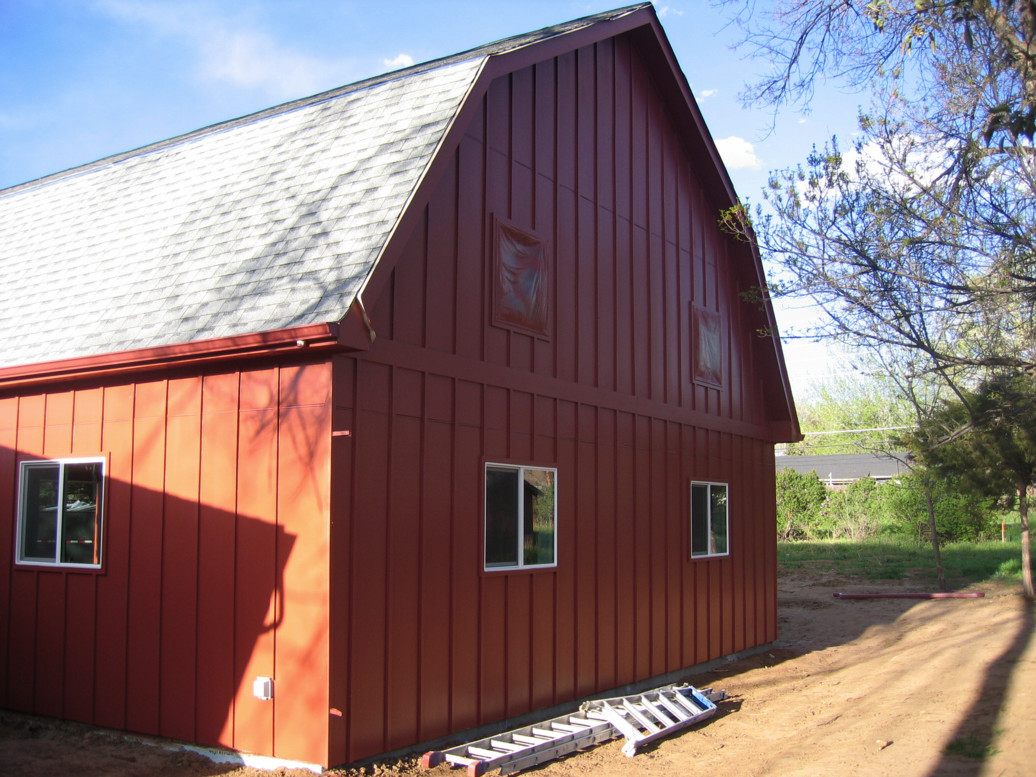
07 April 2009
They made quick work of the Tyvek, siding, and trim on the north gable today thanks to the lift, but
almost buried it in the mud moving it around to the south side. However, it's there and ready to go in the
morning and the south wall and gable should look like the north before the lift goes back to the rental
company tomorrow afternoon. The roofers should be back tomorrow to start laying shingles and hopefully
will be done on Friday. The electrician started running wire and setting boxes today so that should be
all in next week as well. Compare this view of the north wall with the one taken yesterday.


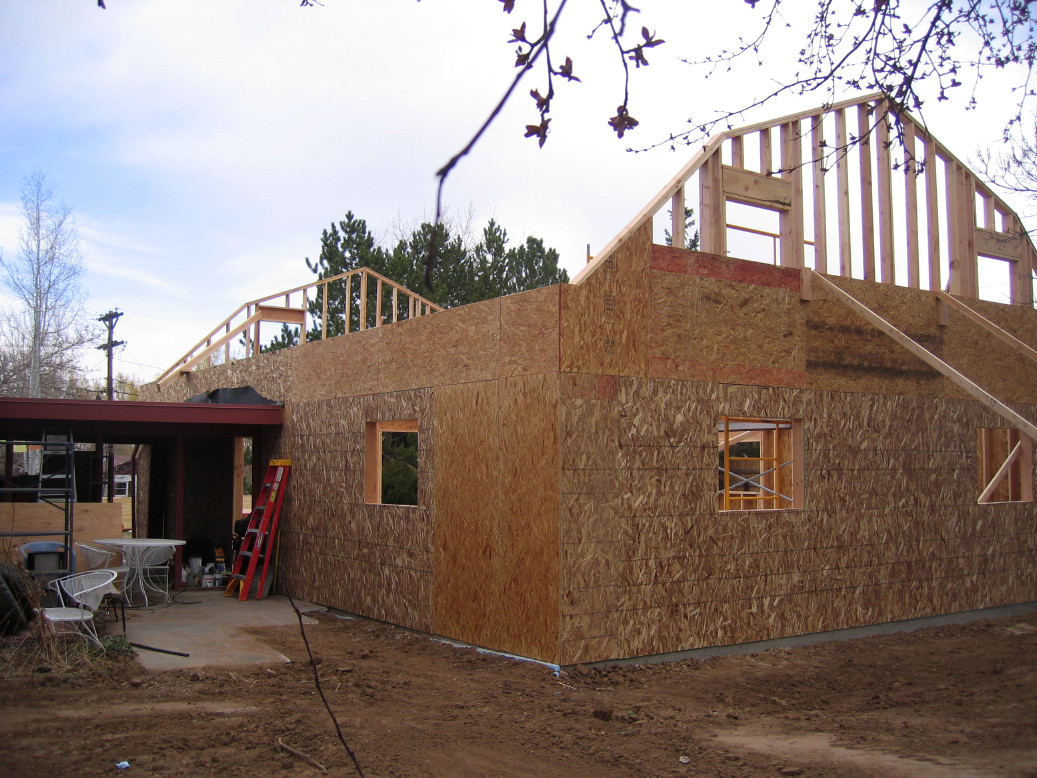
08 April 2009
The south wall is now sided and all the trim is up on the gable and roof overhang. The roofers put the
shingles on the peak just in time for the predicted storm and it might be that the roof won't be done by
the weekend. There's more wire on the inside and the breaker panel is ready for installation. I'm going
to need to get light fixtures ordered.


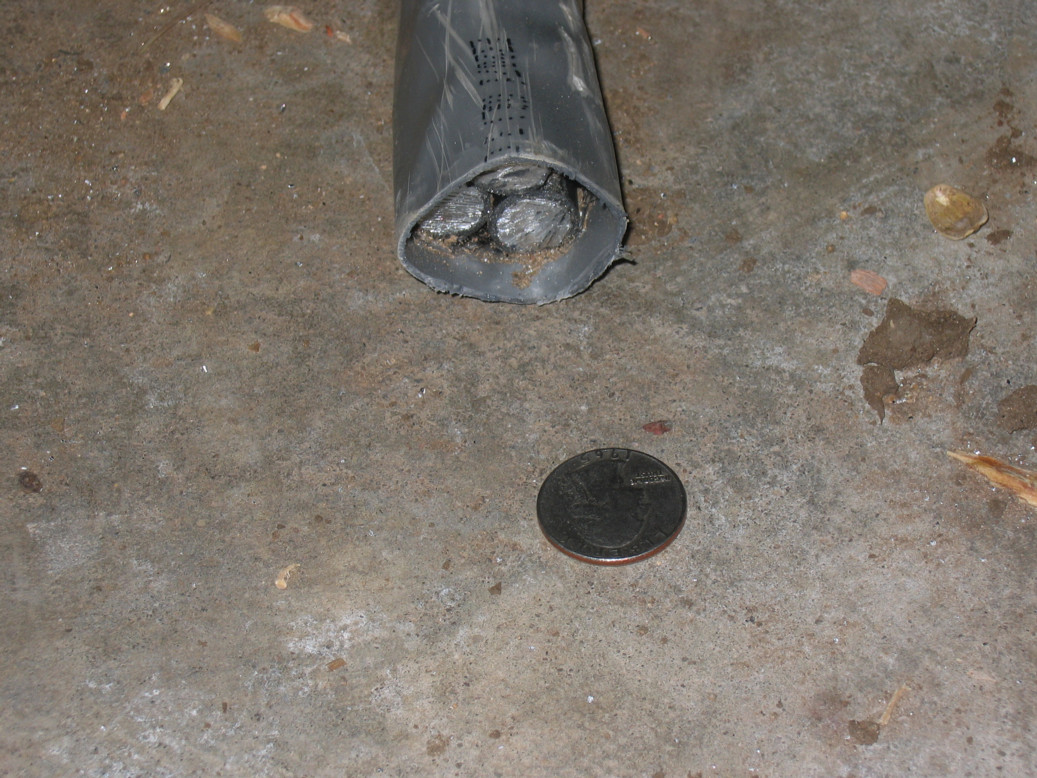
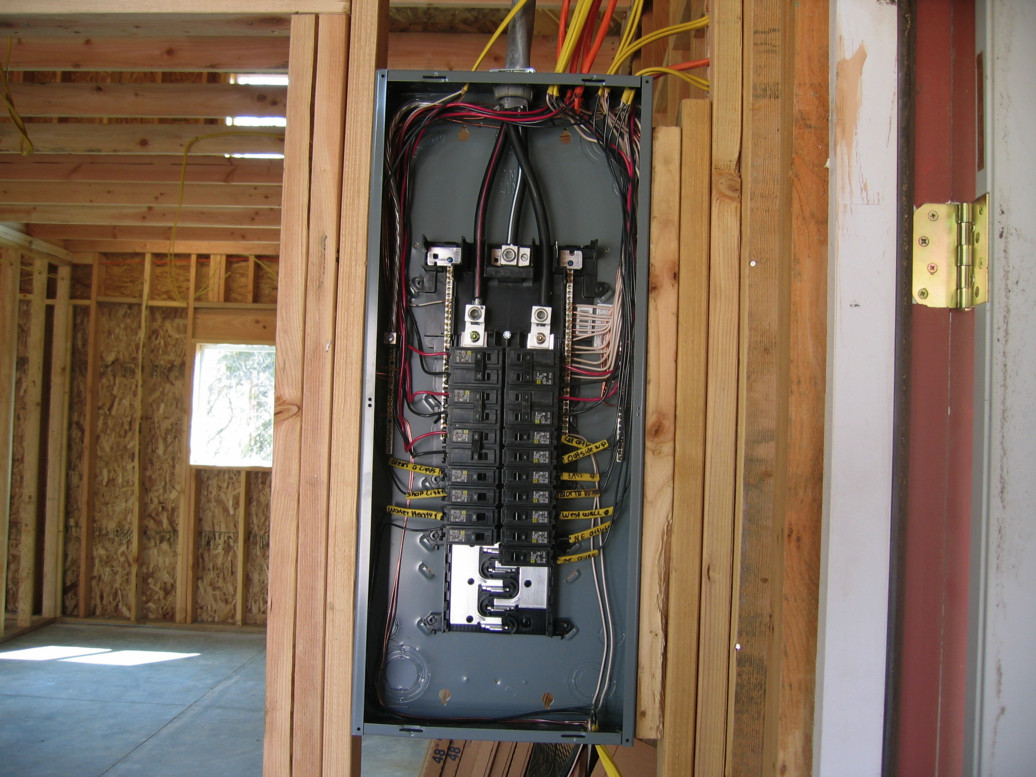
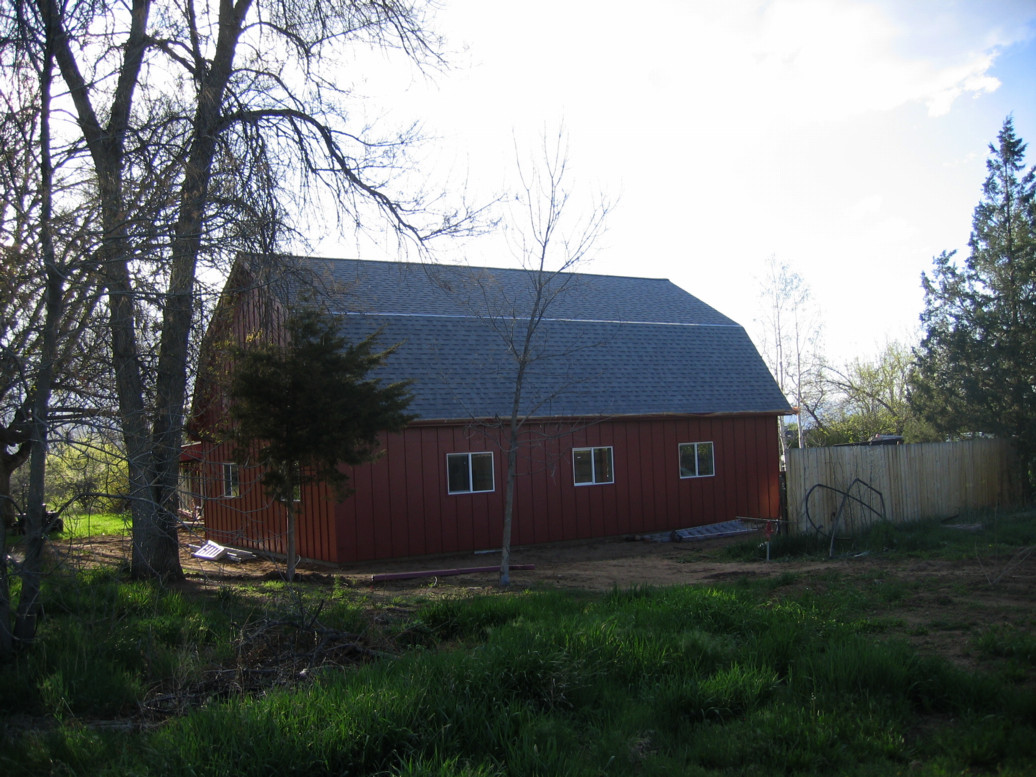
09 April 2009
Siding is up on the east wall and soffit and vents are installed. The roofers didn't work today, but the
electrician and his helper spent most of the day running the 4 conductor 4/0 wiring from the main service
panel on the house through the crawl space and over to the garage service panel location. I'll have a full
200 amps available to me with 220 volts for the compressor and lift as well as 3 extra outlets for welders
and whatever might find its way into the building. There will be 7 quad outlet 110 volt outlets scattered
around as well.


10 April 2009
Battens are starting to go up and the side door is back in place. The service panel is wired. 5 30 amp 220
volt circuits, 11 20 amp 110 volt circuits. I found out that in order to get the 4/0 cable through the conduit
that they had to use the contractor's truck to pull it.


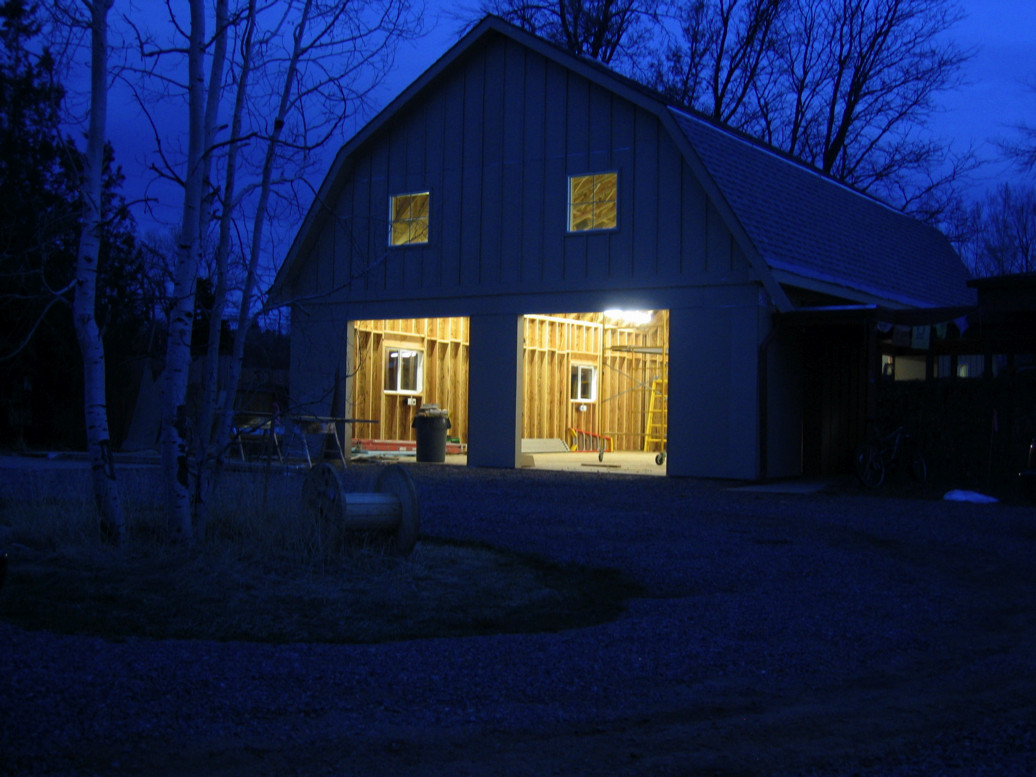
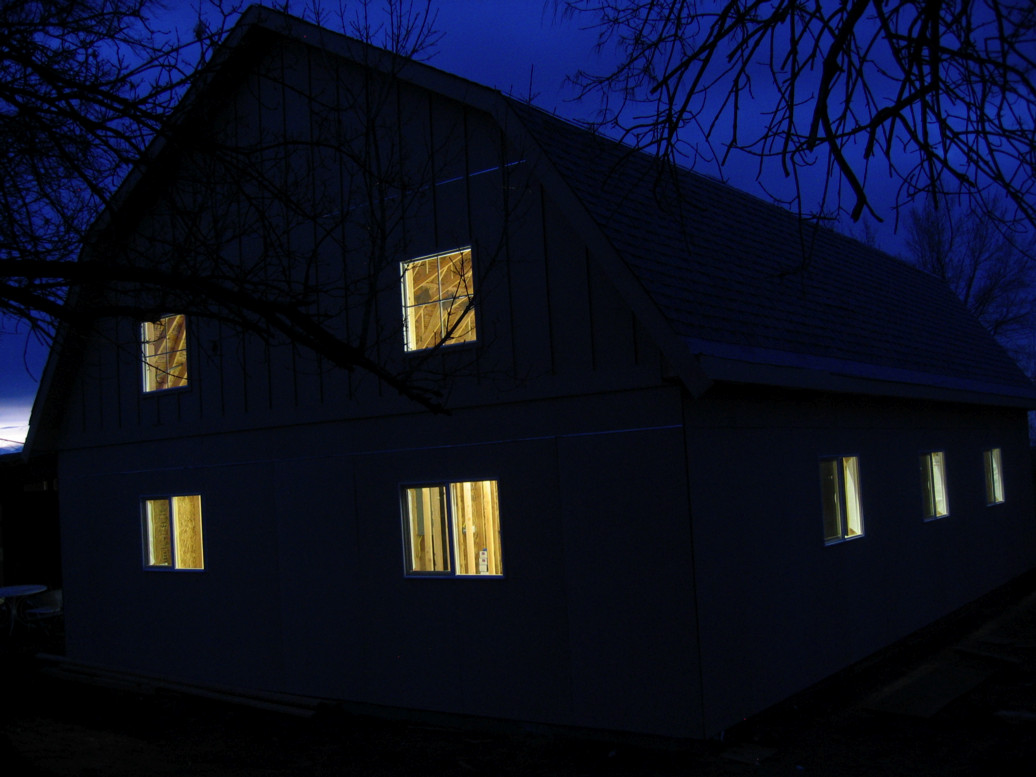
11 April 2009
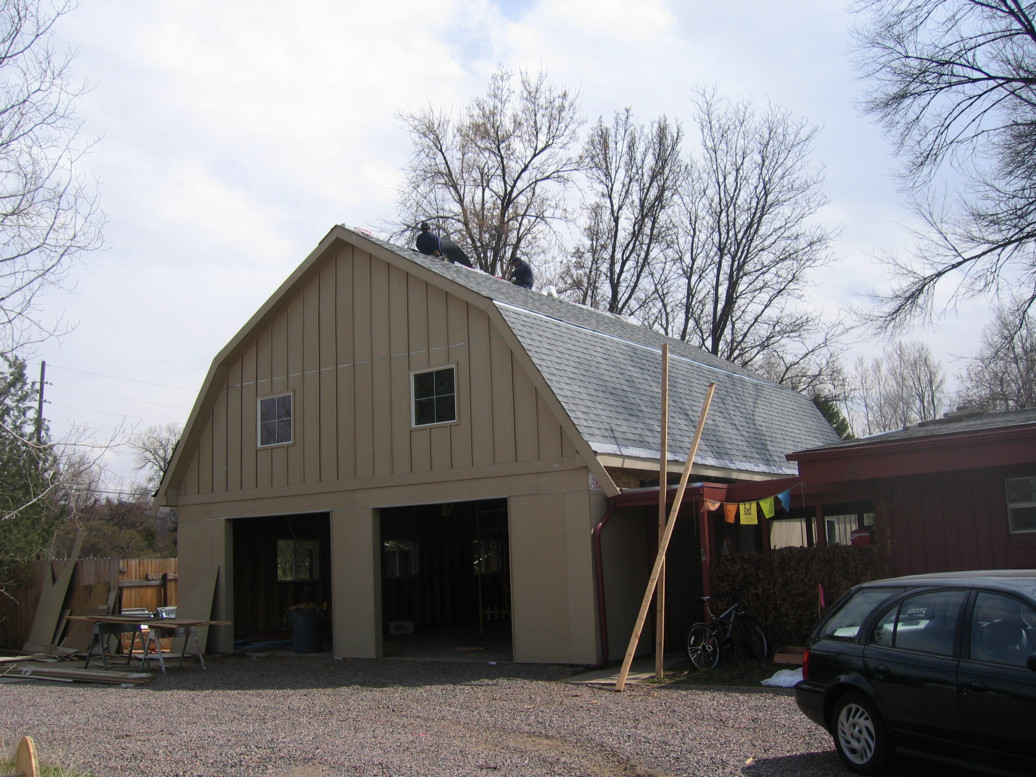
The roofers showed up this morning and started putting shingles down. The electrician also showed up and began
installing outlets and the initial batch of fluorescent lighting. By the end of the day the roof was almost finished
and there's power and lighting inside. These both feel like major steps.


As it got dark I decided to see just how much light the fluorescents put out and get an idea of whether there
will need to be more lights installed. Although I probably can't say until I've worked in it a while, I think this
looks really nice! Photos are the north side, south side, interior looking south, and interior looking north.


17 April 2009
I haven't posted any pictures for a week simply because the work on the garage during that time didn't make
much of a visual difference. The roof was finished and the last of the battens are up. Gutters went on in the
rain yesterday and there's mud all over from that process. It took the garage door installers two days to get
the doors up and because of inspection issues the insulation folks had to be sent home today after only doing
part of the ceiling. Oh, and it's snowing again. It rained all yesterday afternoon and night and the snow started
about 6:00 this morning. This is a weird storm with the snow changing to rain to snow and rain and then back
again all day today. The ground is getting close to being saturated and things are going to be a muddy mess for
the next week to ten days. I'm ready for Spring...


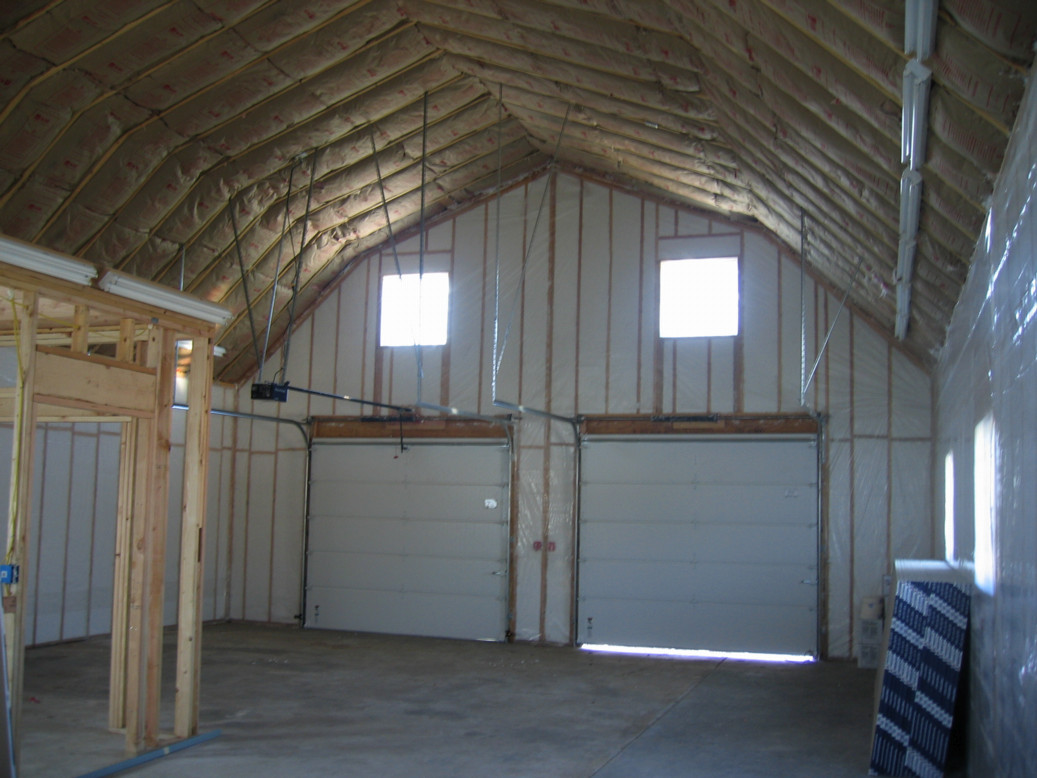
21 April 2009
We finally got the inspector's approval for the concrete, framing, roof, and electrical yesterday. That meant
that we were good to go for the final batts in the ceiling and the blown insulation in the walls. They put the
vapor barrier up and the sheetrock crew is coming tomorrow. Once that's up, we need another inspection before
they can mud and tape. Hopefully that means that the sheetrock will be done by the end of the week.


29 April 2009
In an effort to save money we used a sheetrock company affiliated with the insulation contractor who worked
on the garage. Big mistake. These guys did a lousy job, pawed their way through my tools, and were generally
incompetent and unprofessional. The end result is something I wouldn't accept in my house, but will do for a
garage. And did I mention that one of them managed to plummet through the ceiling of the assembly rooms which
required sheetrock replacement to fix? Sigh... And because of the rain and generally damp weather, the mud is
taking forever to dry so it will probably be next week before we can think about paint.


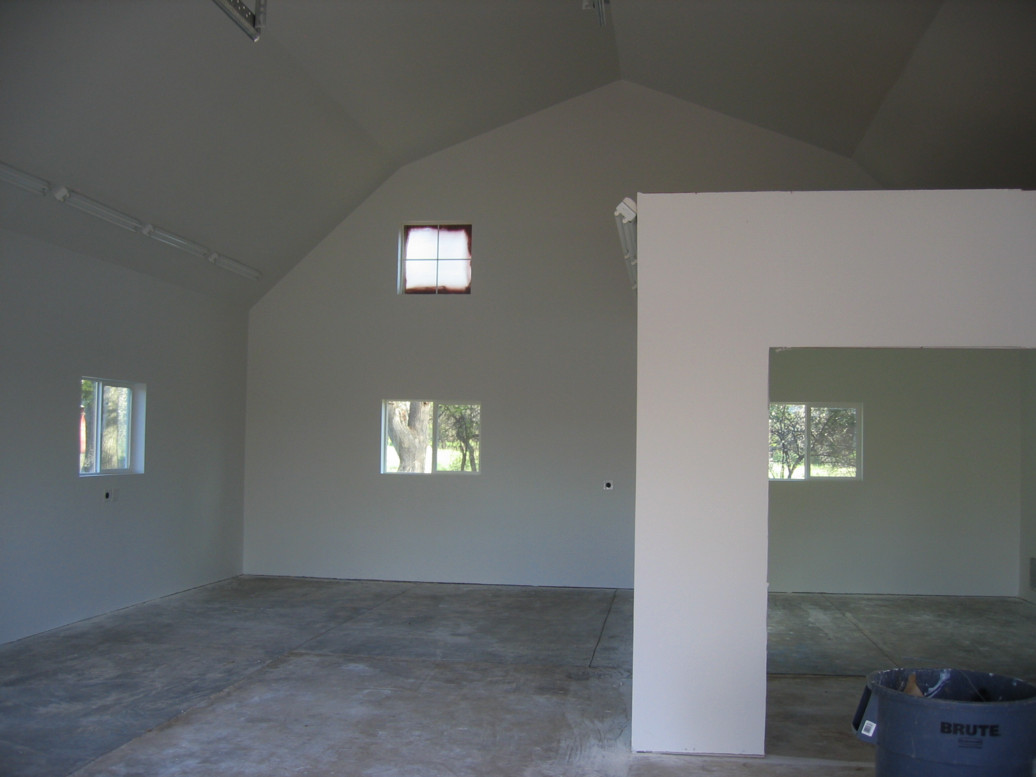
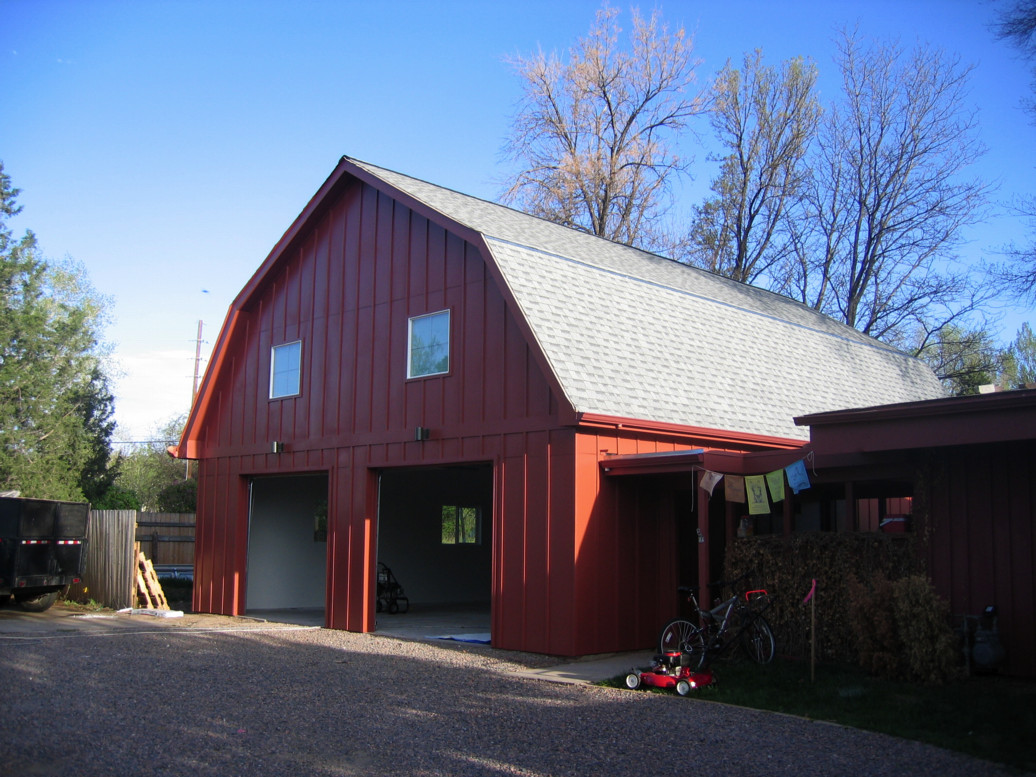
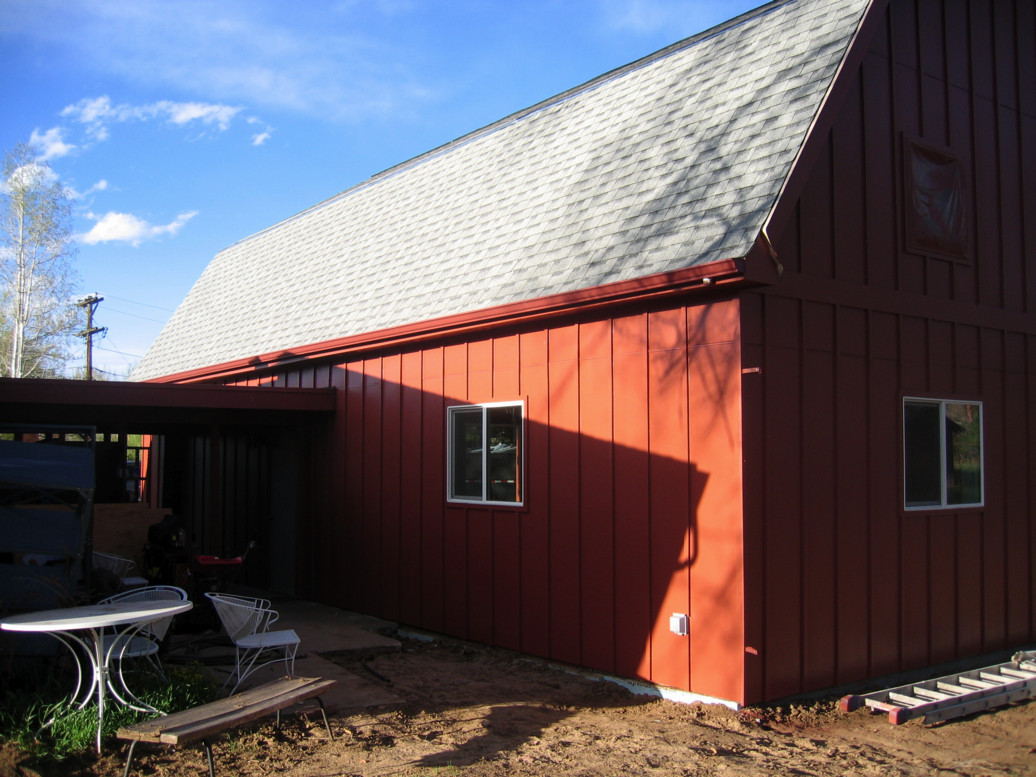
07 May 2009
Wondrously, the painters are the complete antithesis of the sheetrockers: focused, careful, and thoroughly
professional. The inside and outside are both primed and painted and tomorrow will see the touch up finished.
I'm amazed at how different the garage looks in red to match the house after seeing it in the default beige of
the siding for a month. We still need to install the doors in the assembly room, do the trim, and fix some little
issues, but I should be able to start moving my cruft back in this weekend and be ready to order a compressor
soon. I was preparing to order a lift, but the Kia dealer in Boulder is being liquidated at auction next week and
they have 28(!) two post lifts made by Rotary (a very good brand) so I'm going to see if I can save some money.
If not, the BendPak will be on its way this time next week.


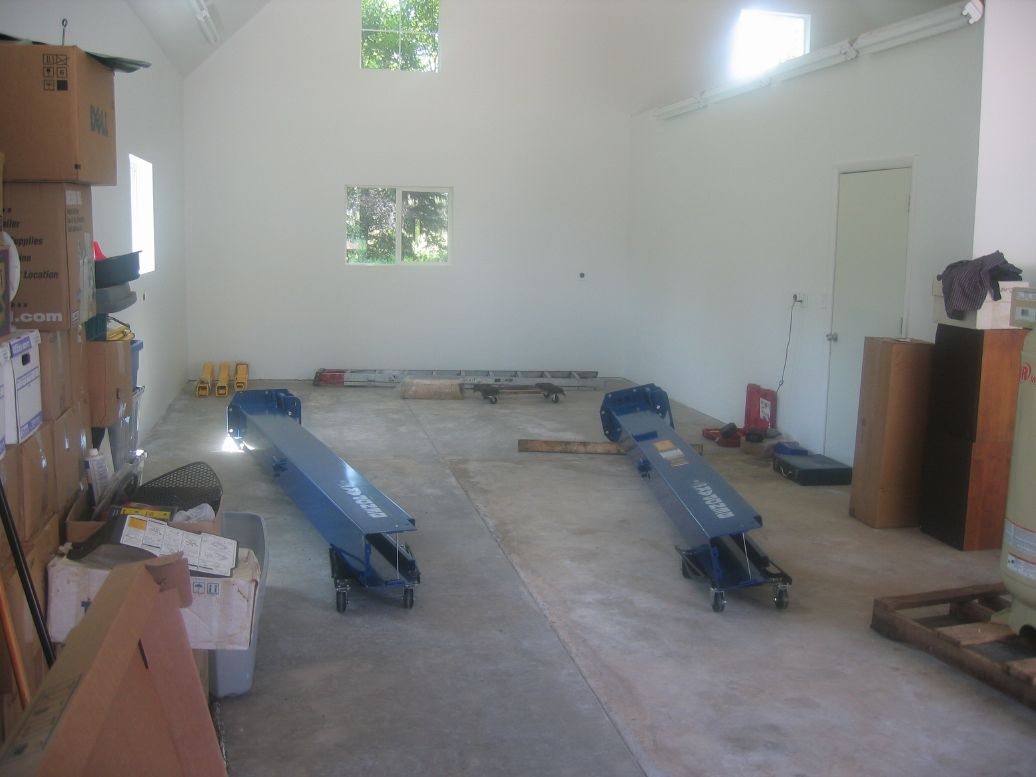
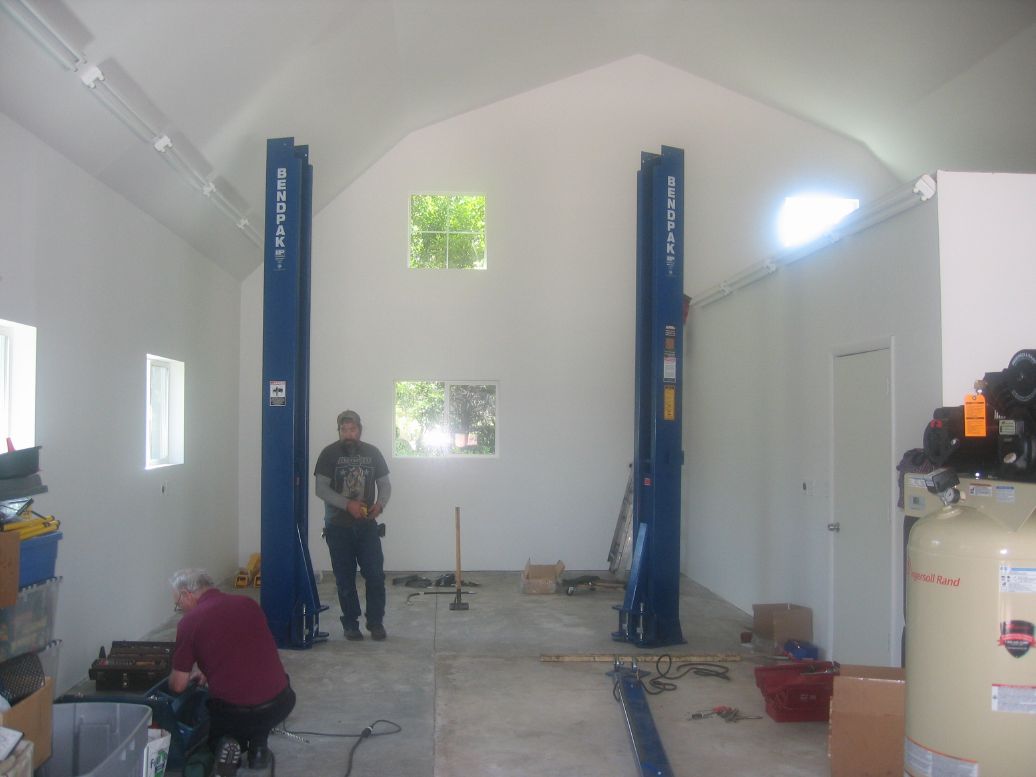
19 June 2009
There's not been much progress on the garage in the last month for a variety of reasons, but that all changed
yesterday when the new air compressor (5hp Ingersoll-Rand with an 80 gallon tank) and the two post lift
(Bendpak 10,000 lbs XPR-10AC) were installed. The new Miller MIG welder (Millermatic 180AS) and plasma cutter
(Spectrum 375 X-Treme) are due in next week. This weekend I plan to get power cords on the compressor and
lift, begin the air line plumbing, move the GTO into the garage, and make some purchases for a new project
my grandson and I are going to get started on soon...


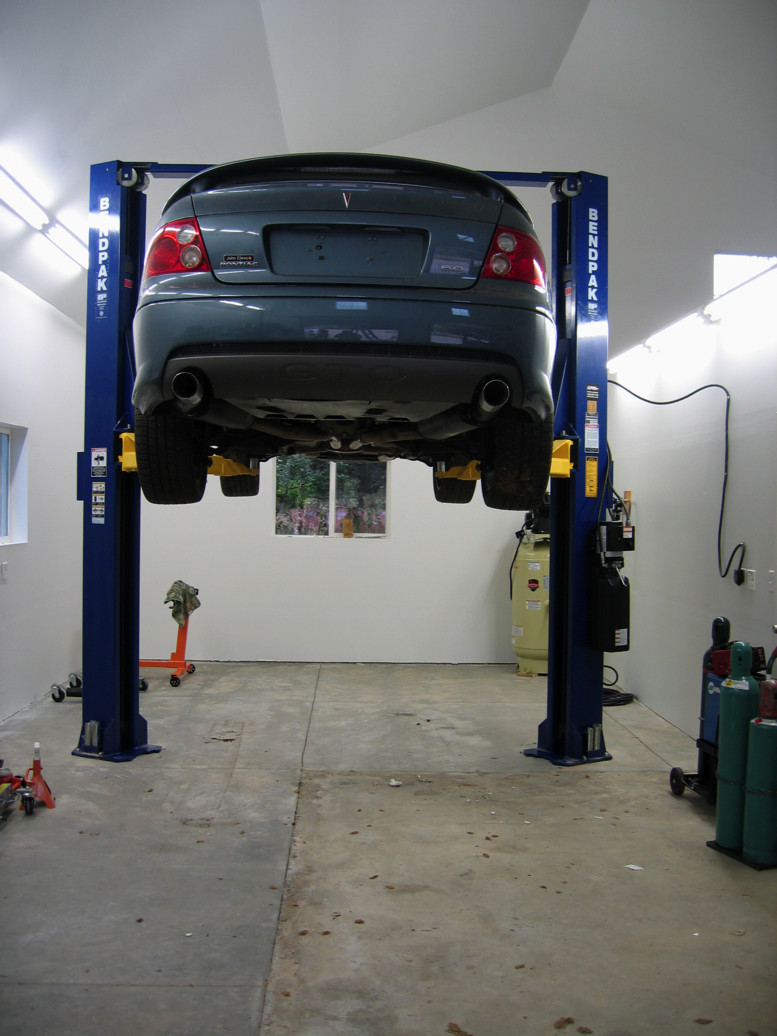
08 September 2009
Things have been moving slow because of other demands on my time, but I've finally gotten the air compressor
plumbed enough to use and finally put the GTO up on the lift yesterday. Two milestones!


Back to the top